


So, you want one of those rustic DIY bathroom vanity. The ones that look like they came out of some old farmhouse. They look good, I’ll give you that. A whole lot better than the particleboard junk you get from the big box stores.
- Planning Your Farmhouse Vanity: From Sketch to Structure
- Working with Reclaimed Wood and Live Edge Slabs
- The Budget-Friendly Option: Upcycling Furniture into a Vanity
- Integrating Design Details: Open Shelving and Vessel Sinks
- The Final Step: Applying a Durable, Waterproof Finish
- Your Rustic DIY Bathroom Vanity
- Your Project Awaits: Final Thoughts
I’ve installed countless vanities since I started this back in ’98, and the cheap ones are always the first thing to go. Had to fix one for a lady, Jenny, over on Oak Ridge last year. The whole bottom just… dissolved. From a slow leak she never even saw. A real wood one, one you build yourself, that’ll last. It’s an actual piece of furniture.
People use old barn wood, or they beat up new wood to make it look old. It doesn’t matter. What matters is that you’re building something solid. Something with some character. This is how you do it without calling me in six months to fix it.
Planning Your Farmhouse Vanity: From Sketch to Structure

Alright, don’t even look at a saw yet.
The most important work happens with a tape measure and a pencil. People fall in love with a picture they saw online and just start building, then they realize their plumbing is three inches off. Happens all the time.
First, measure. Everything. Know where your water lines are. Are they coming out of the wall? The floor? This one thing changes the whole inside of the cabinet. Screw that up and you’re calling a plumber. And Bob, my plumber, he’s not cheap. So draw a little map of your wall and mark where everything is. Exactly.
Then think about how you’ll use it. You need drawers to hide all your junk? Or do you want open shelves? Your call. Standard height is usually around 32 to 36 inches after the top is on. But if you get one of those fancy bowl sinks that sits on top, you have to build the cabinet lower. Otherwise you’re washing your face up by your ears. It’s simple math people always miss.
For the box itself, you can go two ways. Build a frame out of 2x4s and wrap it in your nice wood. That’s probably the easiest way, and it’s strong as an ox. You can put a heavy concrete top on a 2×4 frame and it won’t budge. The other way is to build the box from good ¾-inch plywood and then put a face frame on it. Also works.
To make it simple, here are the two main ways you can build the guts of this thing:
| Construction Method | The Good Part | The Hard Part | My Verdict |
|---|---|---|---|
| 2×4 Frame | Incredibly strong. Easy to build. Forgiving of mistakes. | Heavy. Takes up more interior space. | Best for beginners and heavy tops like concrete. |
| Plywood Box | Lighter weight. More interior cabinet space. | Requires more precise cuts and joinery. | A good option if you have a table saw and are confident. |
My Take: For your first time, go with the 2×4 frame. It’s more forgiving and you can’t beat the strength. Don’t overcomplicate it.
Working with Reclaimed Wood and Live Edge Slabs
This is where people get all romantic about the project. Reclaimed wood. Barn wood. It’s got “history.” Yeah, well, it’s also got dirt, nails, and sometimes bugs.
First thing I do with any old wood is run a metal detector over it. Every inch. Ruining a new saw blade on a rusty nail is a mistake you only make once. After that, you gotta clean it. A stiff brush, some water. Then let it dry for a few days. Completely dry. Don’t rush this part.
The real headache is that old wood is never straight. Ever. To do it right, you really need a jointer to get one face flat, and then a planer to make the other side parallel. Most guys doing this at home don’t have those. You can try to get by with a handheld electric planer and a lot of patience, but… good luck.
Those live edge slabs are a whole thing now, too. Same process, you have to get them flat. But you’ll probably find cracks or voids in the wood. That’s okay. I usually fill them with epoxy, the stuff from West System is pretty good. You can tint it black or just leave it clear. It makes the slab stronger and turns what looks like a flaw into part of the look.
The Budget-Friendly Option: Upcycling Furniture into a Vanity
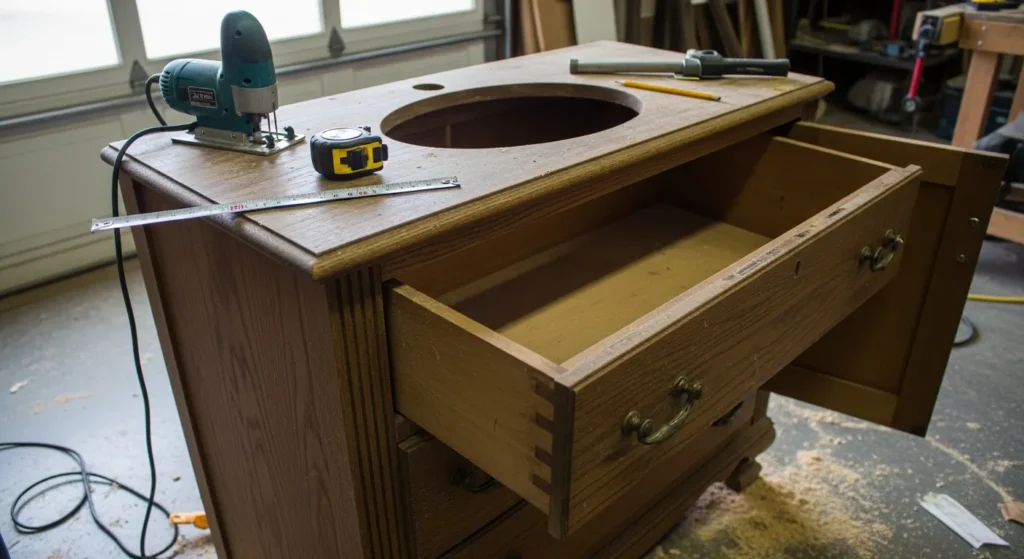
You don’t have to build from scratch. I’ve seen some great vanities made from old dressers or sideboards. It can work.
The trick is finding a solid piece. It has to be real wood. Not that particleboard garbage with a wood-look sticker on it. I’m serious. The first drop of water that hits particleboard, it swells up like a sponge and turns to oatmeal. Game over. I saw a project a guy did—looked great for about a month, then the whole side of the dresser just crumbled. Literally fell apart on the floor.
To turn a dresser into a vanity, you have to do some surgery. You’ll need a jigsaw to cut out the hole for the sink and faucet. But the real work is inside. The top drawers are almost always in the way of the sink bowl and the drain pipe. You have to cut away sections of the drawer boxes and then add some new wood inside to brace everything so it doesn’t get wobbly. And always, always reinforce the top from underneath. An old dresser wasn’t built to hold a heavy ceramic sink.
Integrating Design Details: Open Shelving and Vessel Sinks
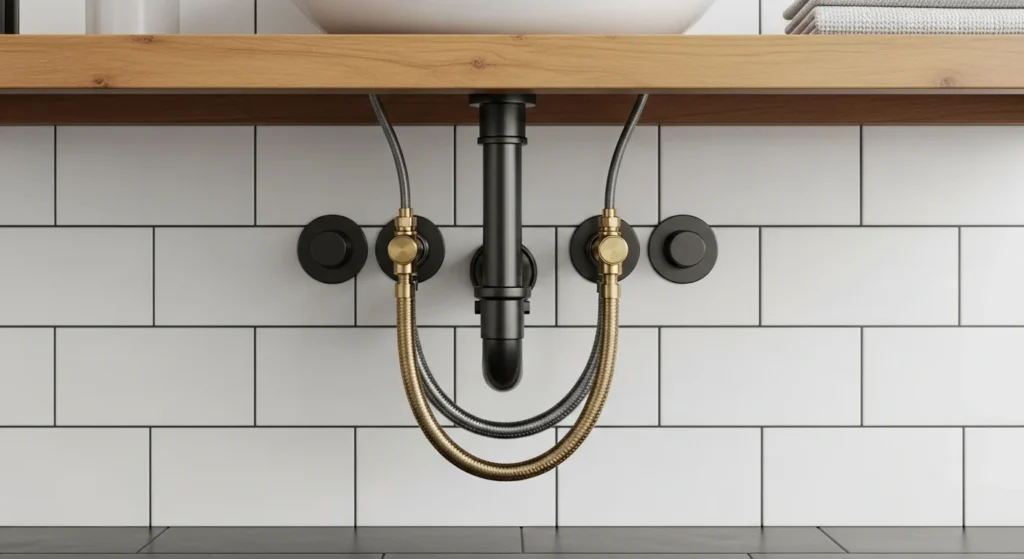
Everyone wants the open-shelf look these days. Looks clean in the magazines.
What they don’t show you is the ugly white PVC drain pipe hanging out for everyone to see. If your plumbing is going to be out in the open, you have to spend a little extra on the pretty stuff. Get a decorative P-trap in matte black or bronze or whatever matches your faucet. The water lines coming out of the wall need to be neat and tidy. Sloppy plumbing on an open vanity just looks terrible.
And vessel sinks. I know I mentioned this, but it’s important. The bowl sits on top of the counter. The cabinet has to be shorter. You want the rim of that sink to land at a normal counter height, say 35 inches. So if you buy a sink that’s 5 inches tall, your wood countertop needs to sit at 30 inches high. Do the math before you make a single cut. This also means you need a taller faucet, one that can reach up and over the lip of the sink. Don’t forget that.
Look, this is the one piece of math you can’t get wrong. Let me lay it out plain and simple.
| Your Sink Height | Cabinet Top Height | Final Sink Rim Height | What it Means |
|---|---|---|---|
| 4 inches tall | 31 inches | 35 inches | This is a comfortable height for most people. |
| 5 inches tall | 30 inches | 35 inches | A very common size. |
| 6 inches tall | 29 inches | 35 inches | Getting taller. Make sure your faucet can clear it. |
Pro-Tip: Always buy your sink and faucet before you build the cabinet. That way you have the real numbers in your hand, not just something from a website.
The Final Step: Applying a Durable, Waterproof Finish
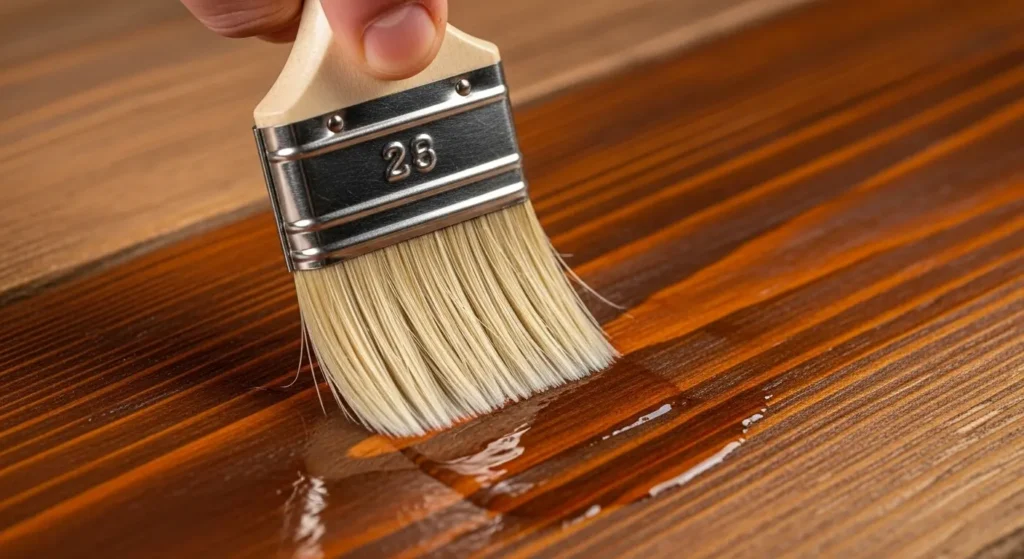
Don’t screw this part up. This is probably the most important part of the whole job. All that work building something beautiful, and you can wreck it in six months if you get lazy with the finish. A bathroom is a wet place. Wood and water are not friends.
For the color, if you want that natural, aged gray look, I usually just use the old steel wool and vinegar trick. Shove a pad of steel wool in a jar of white vinegar, let it sit for a couple of days. Brush it on bare wood. It reacts with the tannins and ages it right before your eyes. But test it on a scrap piece first. It looks different on every type of wood.
Once you have the color, you have to seal it. And I mean SEAL it.
Forget about furniture wax or simple oil finishes. They won’t work. Not here. You need something that puts a waterproof film between the wood and the water. I use a marine spar urethane. It’s made for boats. If it can handle a lake, it can handle your bathroom sink.
Apply at least four thin coats. Four. And the key is, you have to let each coat dry completely, then sand it lightly with some 320-grit sandpaper before the next coat. It’s tedious, I know. But it’s the only way to get a durable finish that will actually last.
People always ask if they can use other finishes. Let’s put them side-by-side so you can see why I’m so stubborn about this.
| Type of Finish | How it Works | Good for a Bathroom? | Why I Say That |
|---|---|---|---|
| Furniture Wax / Oil | Soaks into the wood. Looks nice. | Absolutely Not. | It’s only water resistant, not waterproof. It will fail. |
| Standard Polyurethane | Forms a plastic film on top of the wood. | It’s okay, but not the best. | It’s tough, but not designed for constant water exposure. |
| Marine Spar Urethane | Forms a flexible, UV-resistant, waterproof film. | Yes. This is the one. | It’s made for boats. It can handle your sink, guaranteed. |
My Take: Don’t even think about it. Just get the marine urethane. This isn’t a coffee table, it’s a war zone of water and soap. Use the right stuff.
Your Rustic DIY Bathroom Vanity
So people always ask me the same stuff.
Like, What’s the best wood? Well, the best is something like white oak or teak because they handle moisture well. They’re also expensive. Let’s be honest, you’re probably going to use pine or fir for a rustic look. And that’s fine. It’s cheaper. But you absolutely have to seal it perfectly. I’m not kidding. Miss one spot around the sink drain and it will soak up water and turn black.
Okay, let’s break down the wood choice so it’s crystal clear.
| Wood Type | The Cost | The Catch | My Verdict |
|---|---|---|---|
| Pine or Fir | Low. Easy to find at any lumber yard. | Very soft. Dents easily. Rots fast if not sealed. | Fine for a budget project, but your finish work must be perfect. |
| White Oak or Teak | High. Can be harder to find. | Very hard and dense. Tougher on your saw blades. | The buy it for life choice. Naturally water resistant. |
My Take: Pine is totally fine if your budget is tight, but only if you are religious about sealing it. If you have the cash, white oak is a beast and gives you more peace of mind.
Then they ask about the finish again. I feel like I’m repeating myself, but it’s important. Marine-grade urethane. At least four coats. Sand between each one. That’s the answer. There is no magic shortcut.
And the dresser question. Can I really use an old dresser? Yes. You can. I’ve seen it done well. Just find one that’s solid wood, not particleboard, and make sure it isn’t rickety to begin with. If it’s wobbly in the antique store, it’s going to be worse with a sink full of water sitting on it. You just have to be willing to cut it up and brace it properly.
Your Project Awaits: Final Thoughts
Look, it’s a lot of work. Probably more than you’re thinking. But if you do it right, you end up with something solid. Something that isn’t going to fall apart the first time a kid splashes water everywhere.
Just take your time with the planning and the measuring. And for god’s sake, don’t rush the finish. That’s the step where everyone gets impatient and they always regret it.
You do those things right, and you’ll have a vanity that will probably outlast the rest of the bathroom. Which, depending on who built the rest of it, might not be saying much.