


Knowing how to remove bathtub drain stopper is a skill every homeowner eventually needs. Over the years, I’ve seen countless folks struggle with this, often because they don’t realize there are several different types of stoppers, each with its own removal method.
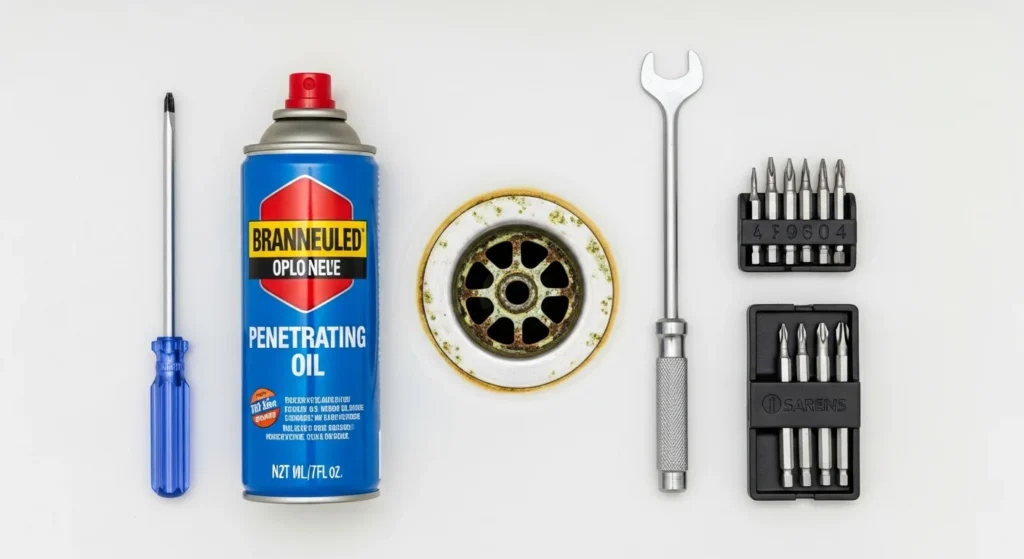
Whether you’re dealing with a slow drain, a lost earring, or simply want to clean the drain properly, getting that stopper out without damaging the plumbing is key. It’s usually a straightforward job if you know what you’re looking at and have the right approach. Most times, you won’t need anything more specialized than a screwdriver or a pair of pliers.
Before you even think about grabbing tools, take a good look at your stopper. Does it turn, push, or lift straight up? Does it have visible screws, or is it part of an overflow plate? Identifying the type will save you a lot of guesswork and potential frustration.
In my experience, the biggest mistake people make is trying to force a stopper out before understanding its mechanism. Let’s walk through the common types you’ll encounter and how to deal with each one.
| Stopper Type | Identification | Operation | Typical Removal Tools |
|---|---|---|---|
| Lift-and-Turn | Small knob/cap on top, visible center screw. | Turn to lock/unlock, then lift to open. | Phillips head screwdriver |
| Pop-Up | Controlled by a trip lever on the overflow plate. | Lever moves stopper up/down. No visible screw on stopper. | Phillips head screwdriver (for overflow plate) |
| Push-Pull | No rotational motion; moves straight up/down. Visible center screw (possibly hidden). | Pull up to open, push down to close. | Phillips head screwdriver, small flathead screwdriver (if cap) |
| Toe-Touch | Sleek, flush with drain opening. Activated by pressing with foot. | Press to open, press again to close (spring-loaded). | Hand (twist counter-clockwise), channel locks (optional) |
How to Remove a Lift-and-Turn Bathtub Drain Stopper
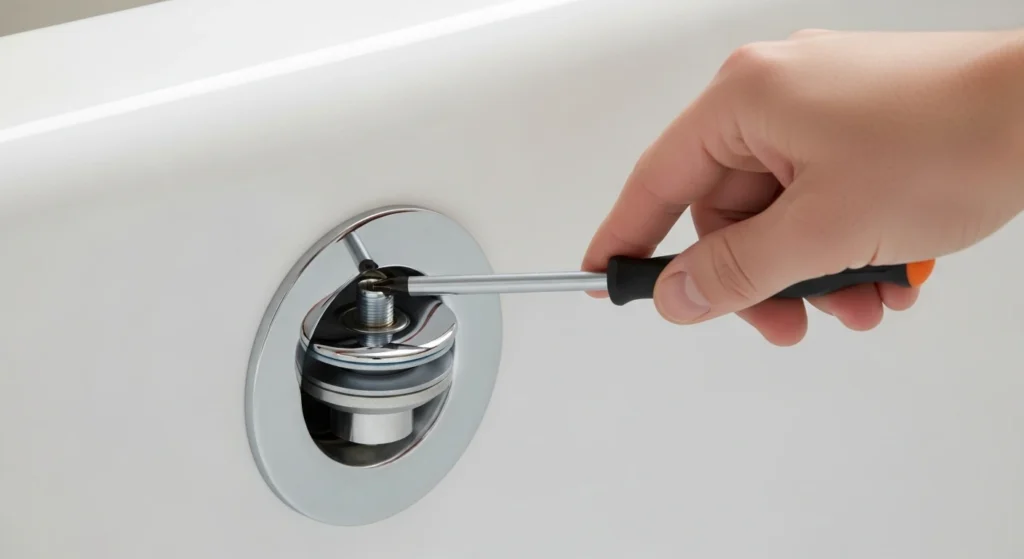
The lift-and-turn style is one of the most common and generally simple to remove. You’ll recognize it because it has a small knob or cap on top that you turn to lock or unlock the stopper, and then lift to open the drain. To remove one of these, you’ll usually start by rotating the stopper in the open position. You might hear a click or feel it disengage.
| Step | Action | Tools Needed |
|---|---|---|
| 1 | Rotate stopper to the open position. | None |
| 2 | Locate Phillips head screw in the center. | None |
| 3 | Unscrew counter-clockwise until loose. | #2 Phillips head screwdriver |
| 4 | Lift stopper straight out. | None |
Sometimes, these screws can be a bit corroded, especially in older tubs. If it’s stiff, a little penetrating oil applied an hour beforehand can work wonders. I’ve had to gently tap the screwdriver handle with a hammer on particularly stubborn ones, but always be careful not to strip the screw head. If the screw head is compromised, you might need a screw extractor kit, but that’s a rare occurrence for this type.
How to Remove a Pop-Up Bathtub Drain Stopper
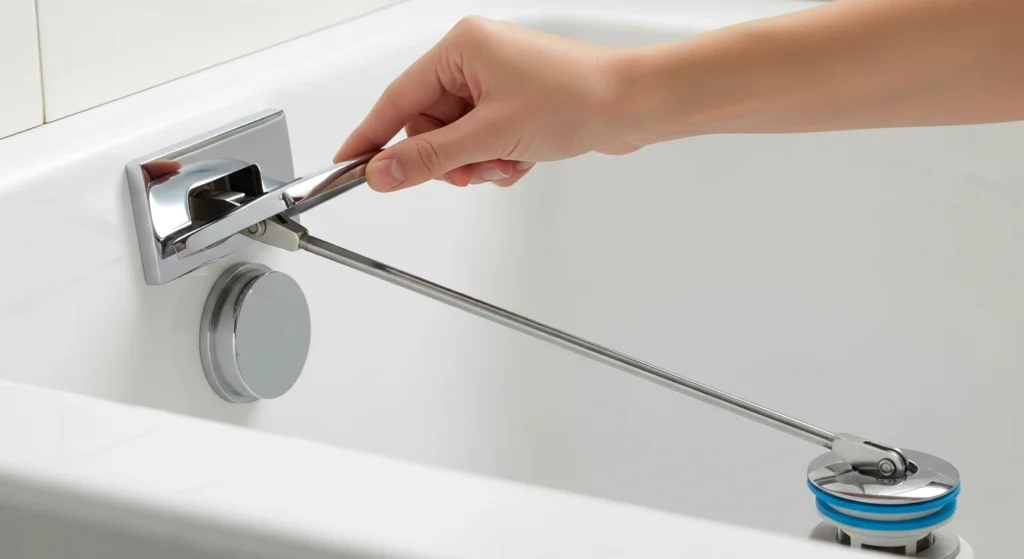
The pop-up stopper is a bit more involved because it’s connected to a linkage system behind the tub wall, controlled by a trip lever on the overflow plate. This is the kind where you flip a lever up or down on the overflow plate, and the stopper moves down in the drain to block water, or up to let it drain. You won’t find a screw directly on the stopper itself for removal in the same way you would with a lift-and-turn type.
| Step | Action | Tools Needed |
|---|---|---|
| 1 | Unscrew the two visible screws on the overflow plate. | Phillips head screwdriver |
| 2 | Gently pull overflow plate away from tub. | None |
| 3 | Carefully pull out the entire assembly (plate, rod, stopper). | None |
| 4 | Detach stopper from the rod (may unthread or be friction fit). | None (sometimes small pliers) |
As you pull, you’ll see a long rod with a spring-like mechanism attached. This is the linkage that connects to the stopper down in the drain opening. Carefully pull this entire assembly – the overflow plate, the rod, and the stopper – out of the tub. The stopper itself is usually attached to the end of the rod.
Sometimes, the stopper can be unthreaded from the rod, while other times it might just be a friction fit or held by a small pin that can be removed. It’s a good opportunity to clean any hair or debris that might be clinging to the linkage rod once you have it out.
How to Remove a Push-Pull Bathtub Drain Stopper
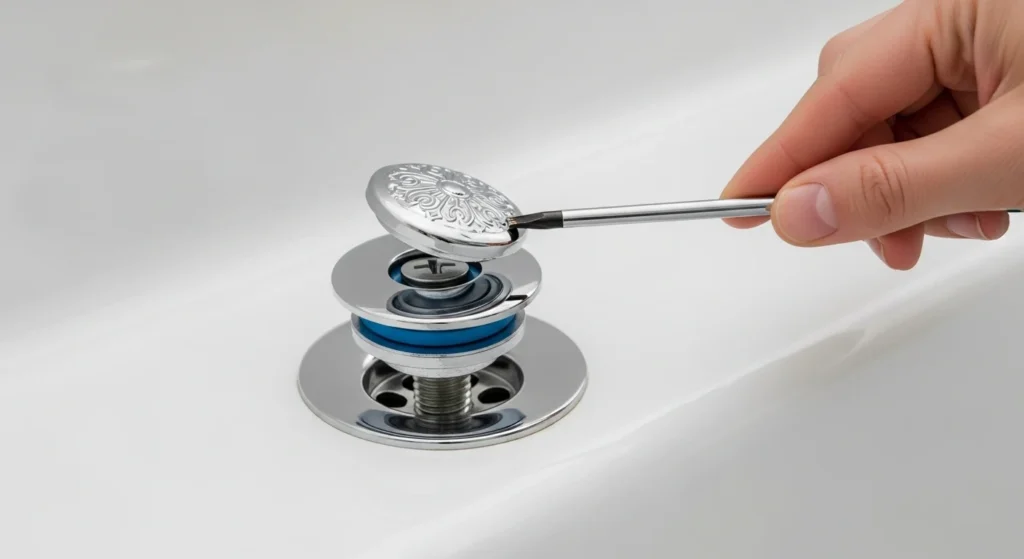
The push-pull stopper, as its name implies, is operated by pushing down to close it and pulling up to open it. It looks similar to a lift-and-turn stopper but lacks the rotational motion. Instead, it moves straight up and down. Just like the lift-and-turn, there’s usually a visible screw, though it might be hidden under a decorative cap.
| Step | Action | Tools Needed |
|---|---|---|
| 1 | Pull the stopper into its open position. | None |
| 2 | Locate small Phillips head screw in the center. | None |
| 3 | (If applicable) Gently pry off decorative cap. | Small flathead screwdriver (optional) |
| 4 | Unscrew counter-clockwise until loose. | Phillips head screwdriver |
| 5 | Lift stopper assembly straight out. | None |
To remove this type of bathtub drain stopper, start by pulling the stopper into its open position. Look carefully at the top of the stopper. You should see a small screw, typically a Phillips head, in the very center.
Sometimes, this screw is concealed beneath a small decorative cap or a threaded top portion. If it has a cap, you might need to pry it off gently with a small flathead screwdriver, being careful not to scratch the finish. Once the screw is exposed, use your Phillips head screwdriver to loosen and remove it by turning counter-clockwise. With the screw completely removed, the stopper assembly should lift right out of the drain opening.
I’ve found these screws can also become corroded over time, so a little patience and a proper-fitting screwdriver are your best friends. These designs are pretty common in older Kohler or American Standard tubs.
How to Remove a Toe-Touch Bathtub Drain Stopper
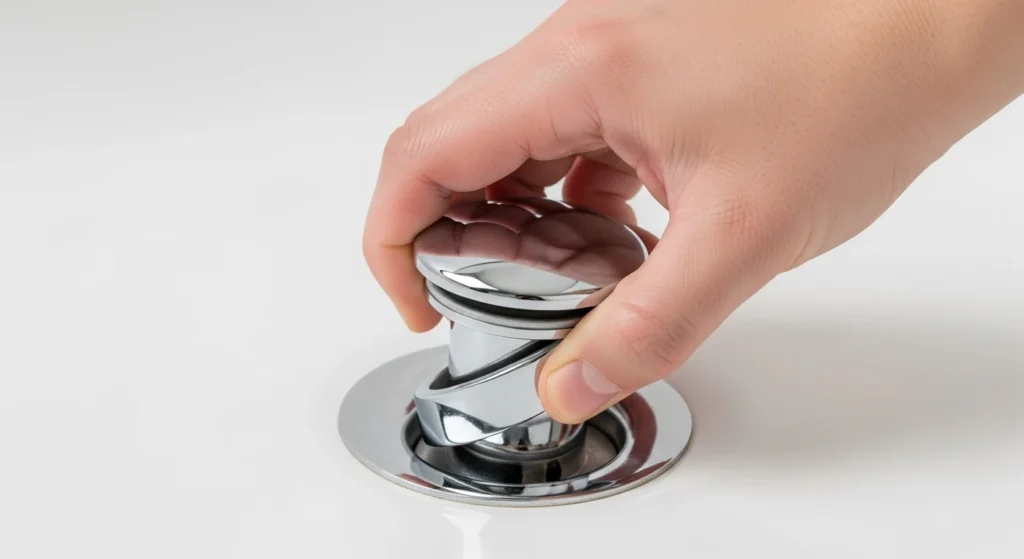
The toe-touch stopper is quite popular in modern bathrooms for its sleek look and easy operation. You activate it by pressing it with your toe: one press to close, another to open. It relies on a spring-loaded mechanism inside the stopper body. The beauty of this design is that its removal is usually very straightforward, often requiring no tools at all, or just one simple tool.
| Step | Action | Tools Needed |
|---|---|---|
| 1 | Ensure stopper is in the open position. | None |
| 2 | Grasp stopper cap firmly. | None |
| 3 | Rotate counter-clockwise to unthread. | Hand, or channel locks (with cloth) |
| 4 | Lift entire stopper assembly out. | None |
The core of a toe-touch bathtub drain stopper is usually threaded directly into the crossbars of the drain opening. To remove it, ensure the stopper is in the open position. Then, grasp the cap of the stopper firmly and rotate it counter-clockwise. It should unthread from the drain body relatively easily.
You might have to apply a bit of force if it’s been in there a long time and accumulated some gunk, but it shouldn’t be overly difficult. If it’s exceptionally stubborn and you can’t get a good grip, you can sometimes use a pair of channel locks, but wrap the stopper in a cloth first to protect its finish. Once it’s unthreaded, the entire stopper assembly, including its spring mechanism, will lift out. This is a great opportunity to clear out any hair or soap scum that has built up around the crossbars.
Troubleshooting and Fixing a Stuck Bathtub Drain Stopper
Sometimes, a bathtub drain stopper just won’t budge, no matter what type it is. This is a common issue and usually signals one of a few problems: corrosion, calcification, or a stripped screw head. Dealing with a stuck stopper requires a bit more finesse and sometimes specific tools, but it’s definitely doable. When I run into a really stubborn one, I always start by assessing why it’s stuck. Is it the screw, or is the whole assembly frozen?
| Problem | Likely Cause | Solution | Stopper Types Affected |
|---|---|---|---|
| Screw won’t turn | Corrosion, rust | Apply penetrating oil, let sit, retry with screwdriver. | Lift-and-Turn, Push-Pull |
| Screw head stripped | Over-tightening, incorrect tool | Use a screw extractor kit. | Lift-and-Turn, Push-Pull |
| Linkage stuck | Hair/soap scum buildup | Remove overflow plate, clear debris from rod/drain. | Pop-Up |
| Stopper seized/stuck | Corrosion, mineral deposits, gunk | Apply penetrating oil or white vinegar; firm counter-clockwise turn (Toe-Touch). | All types (especially Toe-Touch) |
| Stopper seized (extreme) | Severe corrosion, calcification | Hacksaw blade or Dremel tool (last resort, extreme caution needed). | All types |
If the screw won’t turn on a lift-and-turn or push-pull stopper, it’s likely corroded or rusted. I’d recommend spraying a generous amount of penetrating oil, like WD-40 or Liquid Wrench, directly onto the screw head and around the base of the stopper. Let it sit for at least an hour, or even overnight, to allow the oil to penetrate the threads. Then try again with a good quality screwdriver that fits snugly into the screw head.
If the screw head is stripped, meaning the screwdriver just spins without gripping, you’ll need a screw extractor kit. These kits come with bits designed to bite into the stripped screw and allow you to back it out. They’re inexpensive and a lifesaver for situations like this.
For pop-up stoppers, if the linkage is stuck, it’s often due to excessive hair and soap scum buildup around the pivot rod or within the drain body itself. If you can get the overflow plate and linkage out, clearing this debris often frees it up. If the stopper itself is stuck in the closed position and you can’t even get the overflow plate screws out, sometimes gently prying up on the stopper with a pair of pliers can give you enough leverage to get the process started. Always be careful not to damage the tub’s finish.
A small amount of white vinegar poured into the drain and allowed to sit for an hour can also help dissolve mineral buildup around the stopper’s moving parts. These are common issues I’ve had to work through on older cast iron tubs, where corrosion is a real factor.
Finally, for a toe-touch stopper that refuses to unthread, corrosion or mineral deposits are usually the culprits. After trying penetrating oil, if you still can’t get a grip with your hand, a pair of rubber-jawed pliers or channel locks wrapped in a cloth can provide the extra torque needed.
Apply firm, steady counter-clockwise pressure. Avoid excessive force, as you don’t want to break the internal mechanism or strip the threads of the drain itself.
In the most extreme cases, if the stopper is completely seized, sometimes the only option is to use a hacksaw blade or a Dremel tool with a cutoff wheel to carefully cut the stopper out, but that’s a last resort and requires extreme caution to avoid damaging the tub or the drain threads. Always wear eye protection if you go this route.
Knowing how to remove bathtub drain stopper, even a stubborn one, empowers you to handle these common household issues.
Taking the time to remove bathtub drain stopper every so often, just to give the drain a good cleaning, can prevent many of these headaches in the first place. You’d be amazed at the hair and soap scum that accumulates down there. Proper maintenance is always better than emergency repairs. Share your experiences in the comments below, what kind of stopper do you have, and what challenges have you faced?