





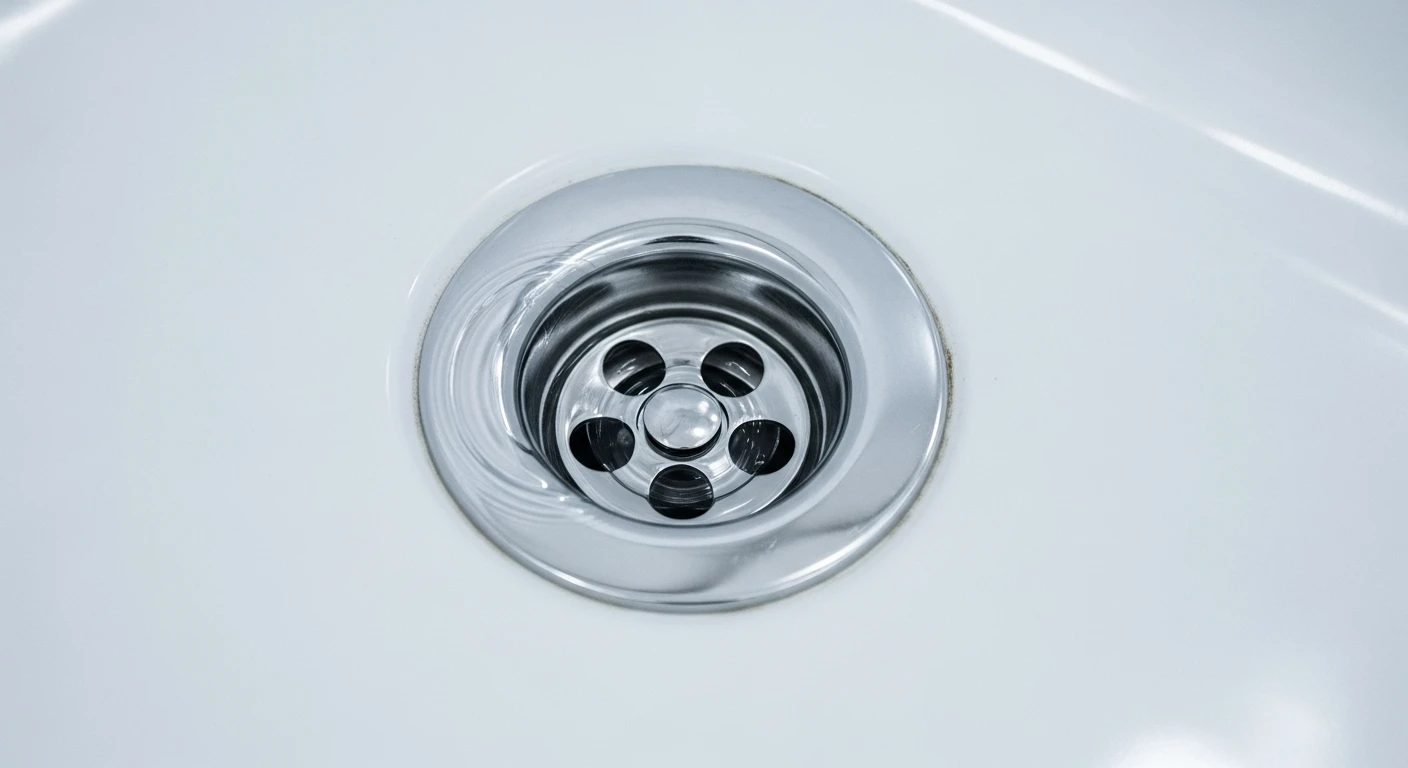

A standard bathtub drain kit (bath waste and overflow assembly) typically requires a 1.5-inch opening diameter, and prioritizing solid brass over plastic ensures decades of corrosion resistance. Choosing the right stopper mechanism whether a toe-touch, trip lever, or lift-and-turn is the foundation of a leak-free installation.
- Understanding the Essential Components of a Bathtub Drain Kit
- Navigating the Common Bathtub Drain Kit Types
- How to Choose the Right Bathtub Drain Kit for Your Specific Tub
- My Step-by-Step Guide to Installing a Bathtub Drain Kit Properly
- Troubleshooting Common Issues and Maintaining Your Bathtub Drain Kit
- Conclusion
Understanding your bathtub drain kit is fundamental for any homeowner. This isn’t just a simple stopper; it’s a critical plumbing system preventing leaks and ensuring proper drainage. Over my decades in this trade, I’ve seen countless homeowners encounter problems due to a lack of understanding.
My aim here is to provide practical, veteran-level advice on everything from components and types to installation nuances and maintenance, empowering you to approach your project confidently. Getting this right means a functional, leak-free tub and fewer future headaches.
Understanding the Essential Components of a Bathtub Drain Kit
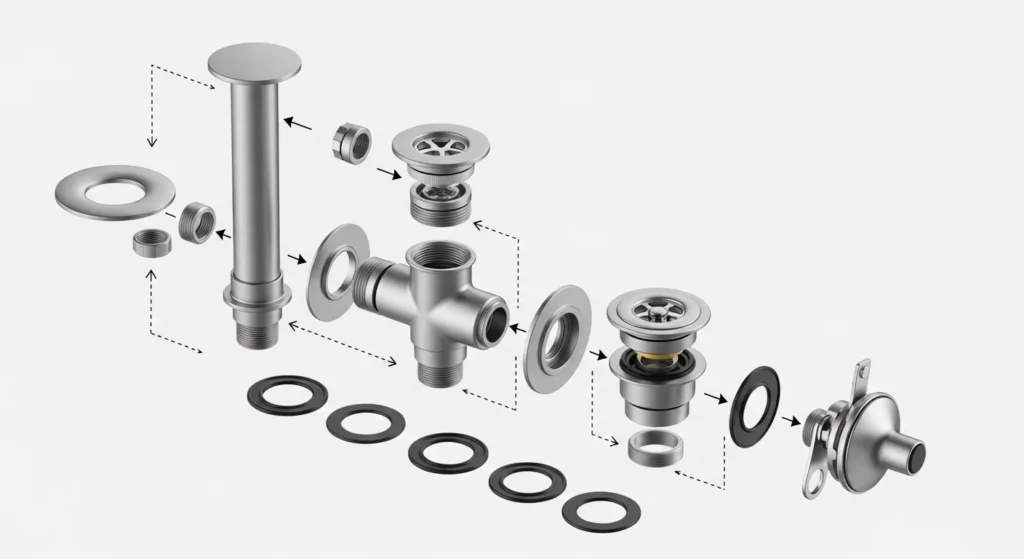
A typical bathtub drain kit, often called a “bath waste and overflow” assembly, is a precisely engineered system. Grasping each part’s purpose is crucial for effective installation and troubleshooting. Many DIYers miss critical details, which commonly leads to hidden leaks or inefficient drainage.
| Component | Location | Primary Function | Key Consideration |
|---|---|---|---|
| Overflow Assembly | Tub wall, visible plate | Prevents tub from overflowing | Robust gaskets are crucial for leak prevention. |
| Drain Shoe | Tub base, T-fitting | Connects overflow tube to main drainpipe | Ensures proper alignment and secure connections. |
| Drain Flange | Inside tub, visible metal piece | Threads into drain shoe, seals drain opening | Meticulous seal (putty/silicone) prevents leaks. |
| Stopper Mechanism | Inside tub/overflow plate | Controls water retention and drainage | Proper adjustment is vital for sealing and flow. |
The Overflow Assembly
This component, located on the tub wall, prevents overflows. It includes the visible overflow plate and the internal overflow tube that runs down inside the tub wall to connect with the drain shoe. Modern kits use robust gaskets; ensure these are perfectly seated. Neglecting this is a frequent cause of insidious, slow leaks I often find in older renovations.
The Drain Shoe and Flange
At the tub’s base, the drain shoe is a T-fitting, connecting the overflow tube to the main drainpipe. The drain flange is the visible metal piece inside the tub, threading into the shoe from above. It’s sealed with plumber’s putty or silicone. A meticulous seal here is crucial to prevent water seeping into your subfloor; always clean the tub surface thoroughly.
The Stopper Mechanism
This system controls water retention. It includes the stopper and its operating linkage. Common types vary: trip levers (which raise/lower an internal plunger), pop-ups (a lever operates a visible stopper), or direct mechanisms like push-pull, lift-and-turn, or toe-touch stoppers.
| Stopper Type | Operation | Advantages | Considerations |
|---|---|---|---|
| Trip Lever | Lever on overflow plate operates internal plunger | Durable, traditional | Internal linkage collects hair, hard to clean. |
| Pop-Up | Lever on overflow plate operates visible stopper | Accessible stopper, easier to clean than trip lever | Internal linkage can still collect debris. |
| Push-Pull | Press to close, pull to open | Simple, reliable, minimal internal parts | Manual operation from within the tub. |
| Lift-and-Turn | Lift slightly, then twist to open/close | Simple, reliable, minimal internal parts | Manual operation from within the tub. |
| Toe-Touch | Press with toe/finger to open/close | Spring-loaded, clean aesthetic, easy to use | No visible external linkage. |
Proper adjustment ensures a full seal when closed and complete drainage when open. A misadjusted stopper is a frequent cause of slow drains, even without clogs.
Navigating the Common Bathtub Drain Kit Types
Choosing the right bathtub drain kit balances aesthetics, user preference, and maintenance ease. Each type has unique characteristics. When clients ask “What type of drain is best for a bathtub?”, I advise considering priorities: looks, convenience, or minimal upkeep.
| Drain Type | Mechanism | Aesthetics | Maintenance/Cleaning | Typical Use |
|---|---|---|---|---|
| Trip Lever Drains | Overflow lever controls internal plunger | Traditional | Prone to clogs, harder to clear | Older homes, classic designs |
| Pop-Up Drains | Overflow lever controls visible stopper | Standard | Easier to clean than trip lever, linkage can collect debris | Common in many bathtub installations |
| Push-Pull & Lift-and-Turn Drains | Manual press/pull or lift/twist stopper | Functional | Very reliable, minimal clogging | Simple, direct-operation, good for low upkeep |
| Toe-Touch Drains | Spring-loaded stopper, tap to open/close | Clean, modern | Generally low maintenance, easy cleaning | Modern bathrooms, minimalist aesthetics |
| Cable-Driven Drains | Knob on overflow plate controls hidden cable | Concealed, premium | More complex to install/repair | High-end, deep, or uniquely shaped tubs |
Trip Lever Drains
Common in older homes, these use a lever on the overflow plate to operate an internal plunger. While durable, the internal linkage often collects hair and scum, making clogs tough to clear without disassembly. They demand precise adjustment during installation.
Pop-Up Drains
Similar to trip levers, these use an overflow lever but actuate a stopper that “pops up” from the drain opening. The stopper connects via a linkage rod. Generally easier to clean due to the accessible stopper, though internal linkage can still collect debris over time.
Push-Pull and Lift-and-Turn Drains
These simpler, direct-operation mechanisms are very reliable. A push-pull drain is pressed to close and pulled to open. A lift-and-turn drain requires lifting slightly, then twisting. Both have minimal internal parts, reducing clogging potential, but need manual operation from within the tub.
Toe-Touch Drains
My personal preference for modern applications, toe-touch drains feature a spring-loaded stopper, activated by a simple press with a toe or finger – one tap to close, another to open. There’s no visible external overflow linkage, offering a clean aesthetic. Installation is often simpler, making them generally low maintenance.
Cable-Driven Drains
These sophisticated options are popular in high-end installations. A small knob on the overflow plate controls a hidden cable, operating the tub’s base stopper. This offers a concealed mechanism and aesthetic flexibility, especially for deep or uniquely shaped tubs. Pricier and more complex to install or repair, they deliver a premium feel and appearance.
How to Choose the Right Bathtub Drain Kit for Your Specific Tub
Selecting the correct bathtub drain kit requires more than just picking a finish. It demands careful consideration of your tub’s construction, ensuring optimal drainage, and focusing on long-term durability. Rushing this step frequently leads to costly re-dos. Here’s what I emphasize with my clients.
Matching Materials and Finishes
Finishes like chrome, brushed nickel, or oil-rubbed bronze should seamlessly match your other bathroom fixtures. Crucially, prioritize the drain body material.
| Material | Initial Cost | Durability | Corrosion Resistance | Longevity | Recommendation |
|---|---|---|---|---|---|
| Plastic (PVC/ABS) | Lower | Moderate | Good (to chemicals) | Shorter | Budget-friendly, quicker wear and tear |
| Solid Brass | Higher | Excellent | Superior | Decades | Strongly recommended for long-term reliability |
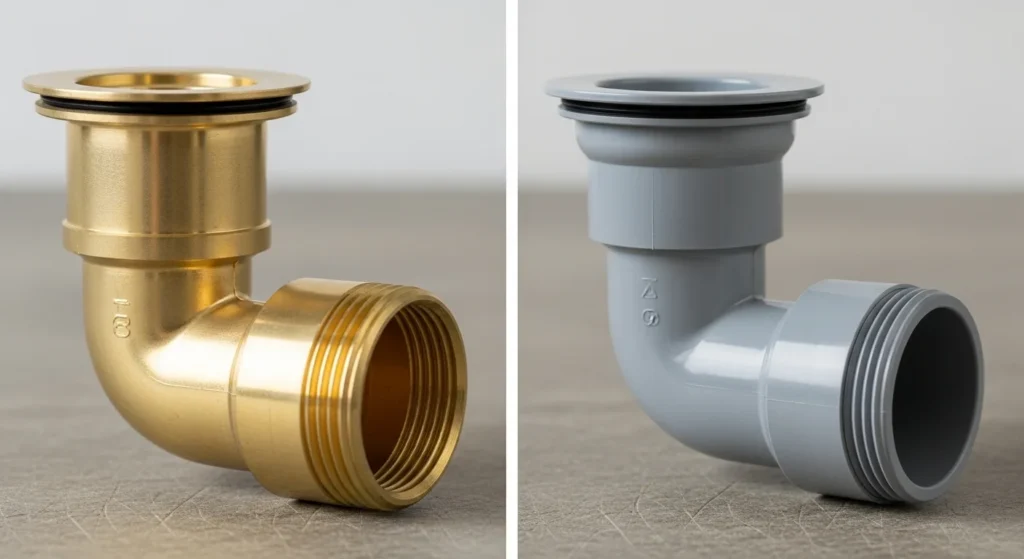
While plastic (PVC/ABS) is cheaper, I strongly advocate for solid brass components. They represent a greater initial investment but offer decades more longevity and superior corrosion resistance, particularly important in hard water environments. I’ve replaced too many plastic assemblies prematurely.
Considering Tub Type and Access
Your tub’s configuration freestanding, clawfoot, or alcove/drop-in dictates the appropriate drain kit. Freestanding tubs often need exposed waste and overflow assemblies, which are designed to be visually appealing. Alcove tubs use hidden assemblies.
Critically, evaluate access. If your tub is enclosed, you’ll require access from below (a crawl space or basement) or through an access panel. Limited access might favor simpler, toe-touch or cable-driven drains over internal linkage types.
Sizing and Compatibility Checks
This is a frequent pitfall. Most modern tubs use a standard 1.5-inch drain opening, but older or specialty tubs can vary. Always measure your existing drain diameter and consult new tub specifications. Tub depth is equally vital; “deep tub” kits feature longer pipes.
Also, measure the center-to-center distance from the overflow hole to the main drain hole. This ensures the connecting pipe aligns correctly. Remember, not all bathtub drain kits fit all tubs, so accurate measurements are absolutely crucial.
| Measurement | Description | Importance |
|---|---|---|
| Drain Opening Diameter | Across the main drain hole inside the tub | Ensures the new drain flange fits securely into the tub. |
| Tub Depth | From the tub bottom to the center of the overflow hole | Determines if the overflow pipe length in the kit is adequate. |
| Center-to-Center Distance | Between the overflow hole and the main drain hole | Guarantees the connecting waste and overflow pipe aligns properly. |
My Step-by-Step Guide to Installing a Bathtub Drain Kit Properly
Installing a bathtub drain kit demands precision and patience. Cutting corners invariably leads to leaks and future headaches. In my experience, most problems stem from inadequate sealing or misaligned connections. Here’s my proven approach for a durable, watertight installation.
Preparation is Key
First, lay out all components and review the kit’s instructions. Gather essential tools: pipe wrenches, slip-joint pliers, plumber’s putty, silicone sealant, a clean rag, and a screwdriver. For removing old, stubborn drains, a specialized drain wrench might be necessary. Crucially, ensure the tub surfaces around both drain and overflow holes are meticulously clean, dry, and free of any debris.
Securing the Overflow
Begin with the overflow assembly. From inside the tub, insert the overflow plate and its attached tube into the overflow hole. From underneath, connect the overflow tube to the main waste and overflow body’s elbow. Ensure the rubber gasket is correctly positioned between the overflow plate and the tub wall.
Tighten the overflow plate screws until snug, achieving even gasket compression. Never overtighten, as this risks cracking the tub or stripping threads.
Installing the Drain Shoe and Flange
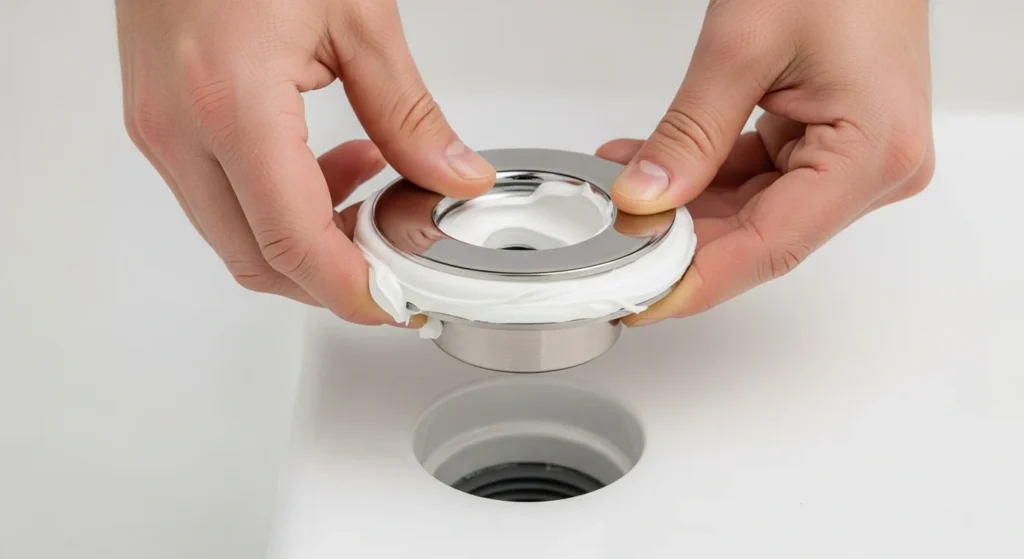
Next, focus on the tub drain opening. Apply a generous, even bead of plumber’s putty around the underside of the drain flange. If your kit includes a rubber gasket, use it, potentially adding a thin silicone bead for enhanced security. Insert the flange into the drain opening from above.
From underneath, thread the drain shoe onto the flange clockwise until hand-tight. Then, use a drain wrench or protected pliers for a final quarter-turn. Excess putty should squeeze out, indicating a solid seal; wipe it away immediately.
Connecting the Waste and Overflow Pipes
With the overflow tube and drain shoe securely in place, connect them using the T-shaped pipe provided. Confirm all gaskets are properly seated at both connections. Hand-tighten these connections, then snug them with a wrench, again avoiding overtightening. This entire assembly then connects to your home’s main drain line, typically via a P-trap, using appropriate PVC or ABS fittings and solvent cement according to local plumbing codes.
Testing for Leaks
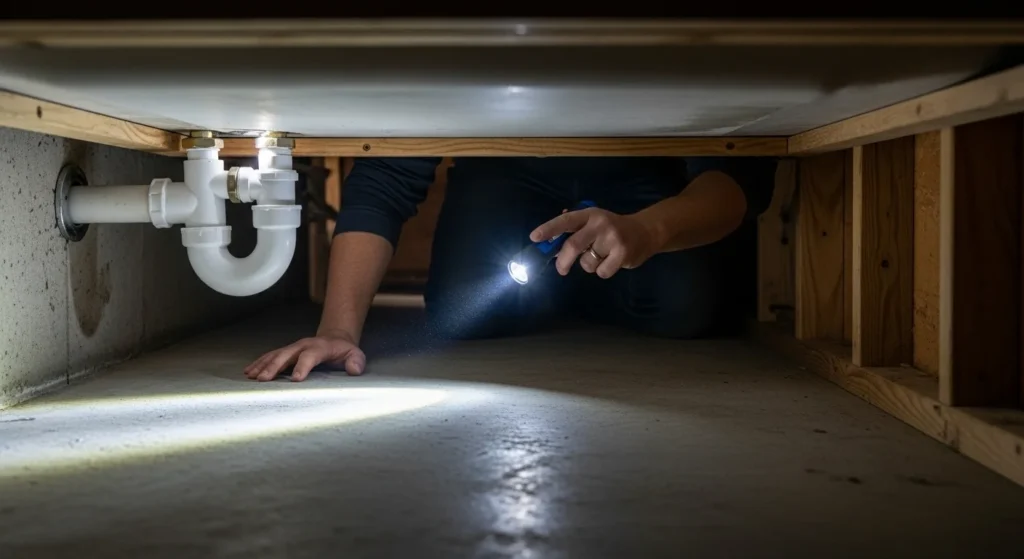
The final and most critical step is thorough leak testing. Fill the tub to its overflow level and allow it to sit for at least 15-20 minutes. With a flashlight and a dry paper towel, meticulously inspect every connection point underneath the tub: the overflow plate, the drain flange, the T-section connections, and where the assembly joins the main drain.
Look for any drips or even faint dampness. If a leak is detected, drain the tub immediately, pinpoint its source, and rectify it before proceeding. Discovering leaks after finishing work is a costly nightmare.
Troubleshooting Common Issues and Maintaining Your Bathtub Drain Kit
Even a perfectly installed bathtub drain kit can develop problems over time. Knowing how to diagnose and resolve common issues, and performing routine maintenance, will save significant time, money, and frustration. Many common fixes are simpler than homeowners anticipate.
Dealing with Leaks
Should a leak appear, accurately identify its source first. Overflow plate leaks often indicate a compromised gasket; tighten screws or replace. Drain flange leaks typically mean failing plumber’s putty; reapply. Pipe connection leaks need checking for tightness, cross-threading, or worn gaskets; plumber’s tape helps brass connections.
| Leak Source | Symptom | Probable Cause | Solution |
|---|---|---|---|
| Overflow Plate | Drips from overflow area | Compromised gasket | Tighten screws or replace overflow gasket. |
| Drain Flange | Seepage around tub drain | Failing plumber’s putty/seal | Remove old putty/seal, clean, reapply new putty/silicone. |
| Pipe Connections | Drips from pipe joints | Loose, cross-threaded, worn gaskets | Tighten connections, replace gaskets, use plumber’s tape. |
Clearing Clogs
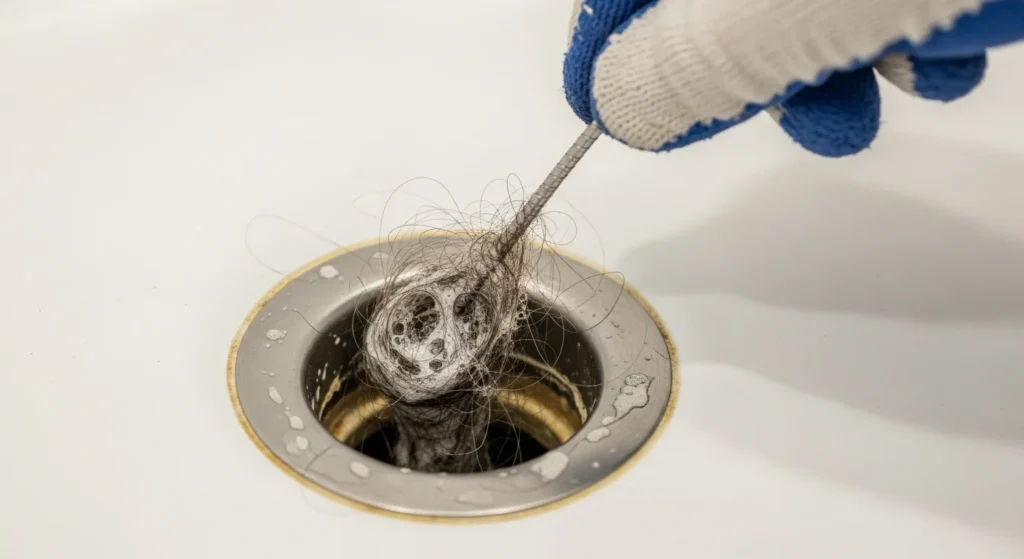
Slow drains are almost invariably caused by accumulated hair and soap scum. For accessible stoppers (pop-up, toe-touch), remove and use pliers or a small snake to extract debris. For trip lever drains, the internal plunger can often be removed through the overflow opening for cleaning.
I rarely recommend chemical cleaners; a plastic drain snake or baking soda/vinegar is safer. Serious blockages require a professional plumber.
General Maintenance Tips
Regular upkeep significantly prolongs your drain kit’s lifespan. Clean visible parts and clear hair from stoppers after each use. Avoid harsh cleaners on plated finishes.
Conduct an annual leak check underneath the tub with a flashlight. A tiny dab of plumber’s grease on linkages for trip lever or pop-up mechanisms ensures smooth operation.
Conclusion
Mastering your bathtub drain kit is an investment in your bathroom’s enduring integrity, not just a plumbing fix. When these unseen components function flawlessly, they’re invisible. When they fail, however, they demand immediate, often costly, attention.
This guide aims to equip you with the practical knowledge for confident installation or effective repair. Remember, diligent planning and precise execution are your best defense against future frustrations and expensive water damage. Don’t wait for a leak to learn; empower yourself with the right knowledge today for a perfectly functioning tub!