





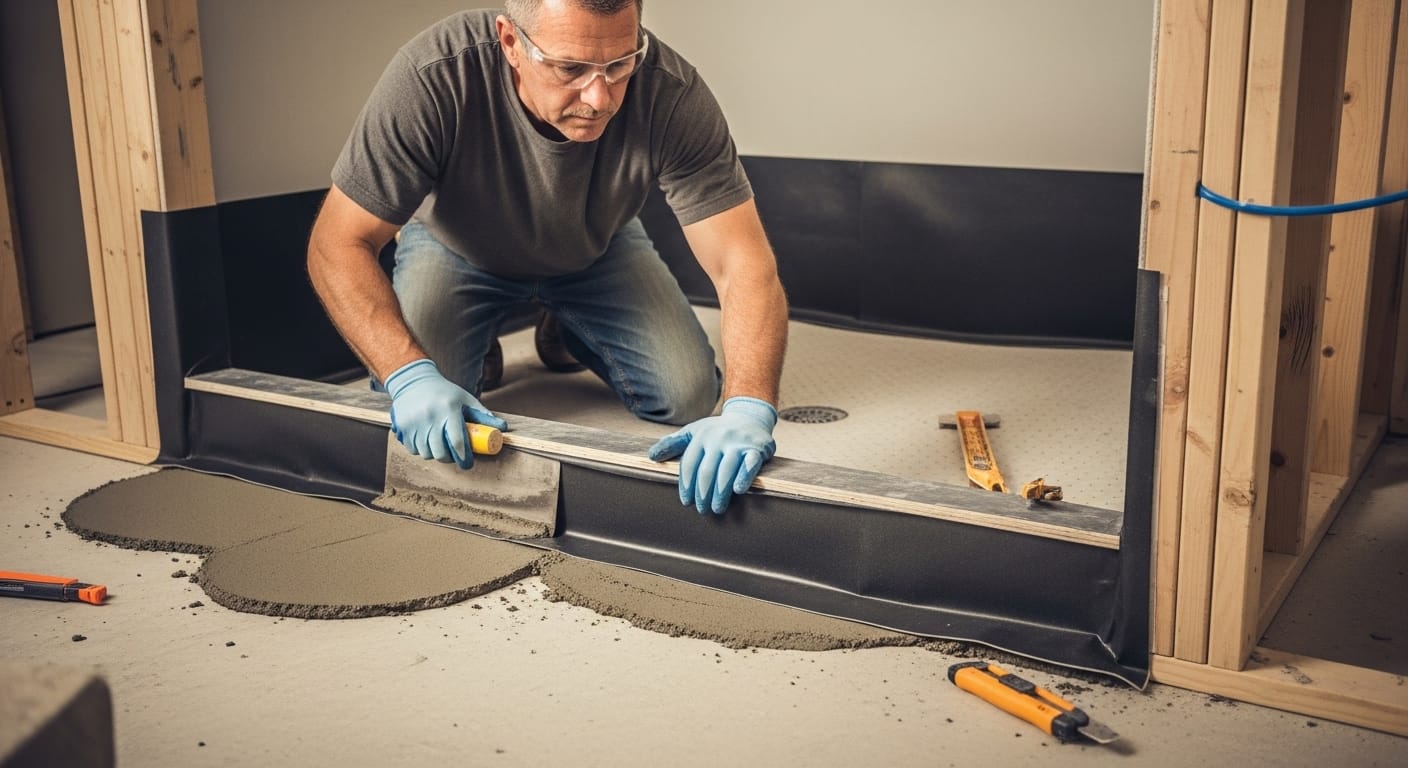

Alright, folks. Michael Donovan here. I’ve spent more years than I care to count knee-deep in tile dust and grout, building bathrooms that stand the test of time. If there’s one thing I’ve learned, it’s that the glamour of a beautiful tile job can quickly fade if what’s underneath isn’t solid. That’s where the shower pan liner comes in. It’s the unsung hero, the vital waterproofing layer that protects your home from water damage, mold, and costly repairs.
If you’re planning a shower renovation, understanding this critical component isn’t just important; it’s non-negotiable for a shower that truly lasts. When homeowners talk about their dream bathroom, they usually focus on the tile, the fixtures, the aesthetics. But me? I’m thinking about the foundation.
I’m thinking about that shower pan liner, because without it, even the prettiest shower is a ticking time bomb. This isn’t just about throwing some plastic down; it’s about precision, material science, and knowing what works and what will inevitably leak.
Believe me, I’ve seen the aftermath of shortcuts, and it’s never pretty. You’re making a significant investment in your home, and getting the shower waterproofing right from day one will save you a world of headaches and expense down the line. A properly installed shower pan liner is the cornerstone of a leak-proof shower.
What is a Shower Pan Liner? Your Essential Waterproofing Layer
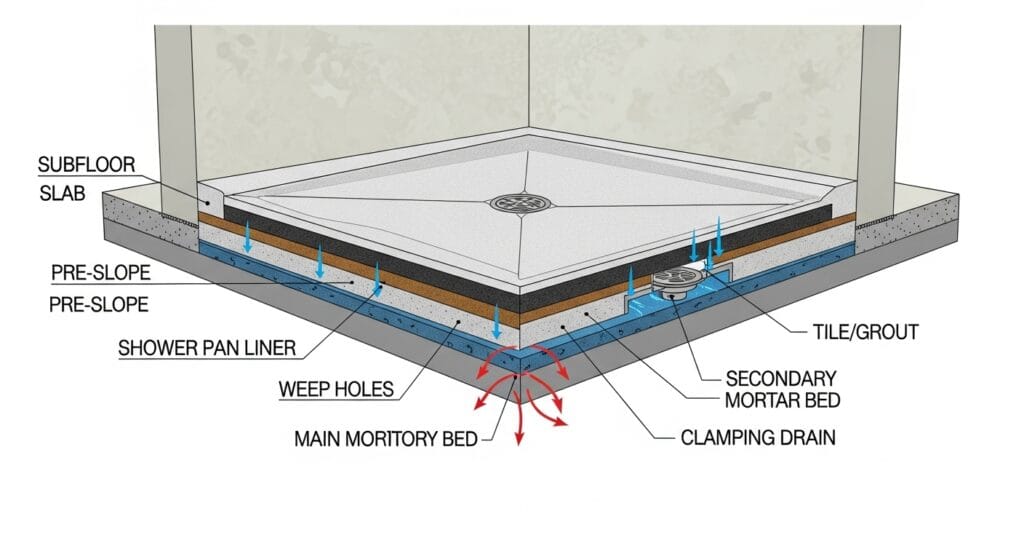
A shower pan liner is essentially a flexible, waterproof membrane installed beneath your shower floor and extending up the walls, acting as the primary barrier against water escaping the shower enclosure. It’s designed to catch any moisture that might seep through the grout lines and the mortar bed, directing it towards the weep holes in your shower drain. Think of it as a hidden, shallow swimming pool liner that keeps everything contained.
Without this critical layer, water would penetrate the subfloor, rot wood, damage drywall, and eventually lead to structural issues and mold growth throughout your bathroom and beyond. In my experience, many homeowners mistakenly believe that grout and tile are waterproof. They’re not. Grout is porous, and while tile is impervious, the joints and even hairline cracks can allow water to pass.
This is why a robust, properly installed shower pan liner is the absolute backbone of a watertight shower system. It’s not a backup; it’s the main line of defense for a truly leak-proof shower. Ignoring its importance or skimping on its quality is one of the most common and costly mistakes I see people make. A good liner, correctly installed, provides peace of mind that your beautiful new shower won’t be a source of problems years from now.
Types of Shower Pan Liners: Choosing the Best Material
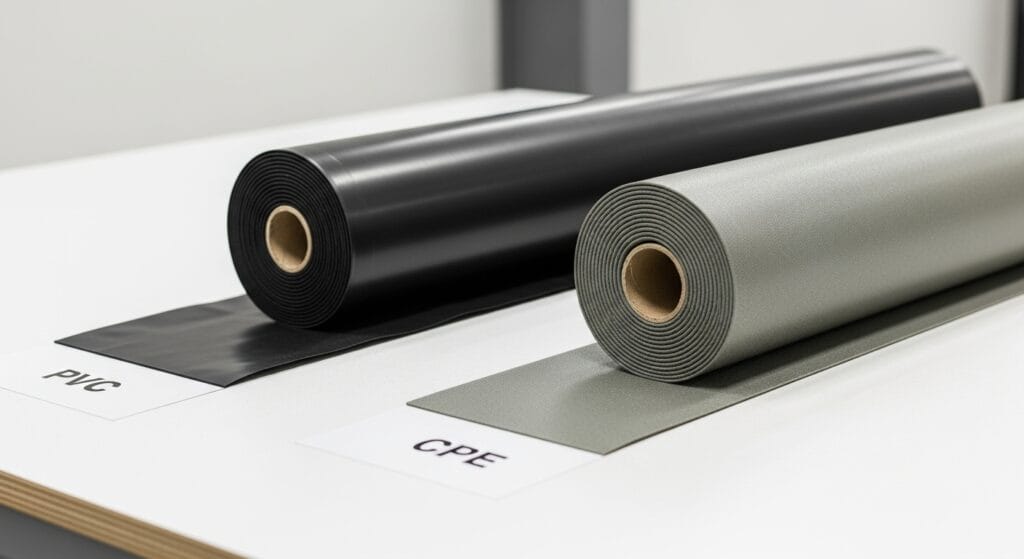
When it comes to the liner for your shower base, you’ve got a few options, each with its own set of characteristics. The choice isn’t just about price; it’s about the application, the longevity you expect, and even the local climate. I’ve worked with them all, and I can tell you there are distinct advantages and disadvantages to each. Knowing these differences will help you make an informed decision, whether you’re buying materials for a contractor or tackling a serious DIY shower pan liner installation.
PVC Liners: The Common Workhorse
PVC (Polyvinyl Chloride) liners are probably the most common type you’ll encounter. They’re flexible, relatively inexpensive, and readily available at most hardware stores. Brands like Oatey and Noble make widely used PVC liners. I’ve used thousands of square feet of this stuff over the years. It’s a solid choice for many projects.
PVC liners are cost-effective, easy to cut and form, and widely available. However, they can be susceptible to punctures if not handled carefully, and can get stiff in cold weather, making installation trickier. There are also some concerns about their environmental impact, and they are not compatible with all thin-sets and adhesives, so careful product pairing is necessary.
CPE Liners: My Personal Preference for Durability
CPE (Chlorinated Polyethylene) liners are a step up in my book. They’re often a bit more expensive than PVC, but they offer superior flexibility, especially in colder temperatures, and have excellent resistance to chemicals and mold growth. When a client asks for the best shower pan liner material for longevity, I often lean towards CPE.
CPE liners are more flexible and pliable than PVC, even in cold conditions, and boast better chemical resistance and excellent puncture resistance, contributing to a longer lifespan. Their main disadvantage is a slightly higher cost, and they might be less common at smaller local shops compared to PVC.
Hot-Mop Liners: The Old-School Craftsman’s Choice
For those really traditional, often larger custom showers, or in specific regions (like parts of California), you might run into hot-mopped shower pans. This involves applying layers of hot asphalt and felt paper to create a seamless, impenetrable barrier. It’s an art form, really, and requires specialized skills and equipment.
Hot-mopped liners are extremely durable and, when done right, completely seamless, offering excellent shower waterproofing. However, they are labor-intensive, require specialized training and equipment, produce a distinct odor during installation, and come at a higher cost. This is not a project your average DIYer or even general contractor typically tackles.
Liquid Applied Membranes: A Modern Alternative
While not a direct replacement for traditional pan liners in all scenarios, liquid applied membranes like Laticrete Hydro Ban or Schluter Kerdi-Fix (for specific applications) are gaining popularity. These are thick, paint-on products that cure into a continuous, seamless waterproof layer.
They’re often used on walls, benches, and curbs, but can also be used for the pan itself, provided the substrate is correctly sloped and prepared.
Liquid applied membranes offer seamless application, are highly flexible, bond directly to the substrate, and can be applied to complex shapes. Their disadvantages include requiring careful, consistent application for thickness, potentially being more expensive, and needing drying times to be factored in.
A traditional pan liner is often still preferred for the primary pan waterproofing due to its robustness. It’s typically applied over a pre-slope, not as the pre-slope itself.
Pre-Sloping: The Unsung Hero Beneath the Liner
Before any liner goes down, there’s a crucial step many folks overlook: the pre-slope. This is a layer of mortar, pitched at least a quarter inch per foot, directly beneath the shower pan liner. Why is this so important? Because it ensures that any water that does get past the tile and mud bed drains efficiently down to the weep holes in your drain, instead of pooling on top of the liner.
Standing water under your mud bed leads to mildew and a foul smell over time. I’ve been called back to countless showers where this step was skipped, and the homeowner wondered why their new shower smelled like a damp basement. You absolutely need a pre-slope under your shower liner. It’s fundamental for a healthy, long-lasting shower waterproofing system.
Step-by-Step Shower Pan Liner Installation Guide
Alright, let’s talk brass tacks. Installing a shower pan liner correctly is all about meticulous preparation and attention to detail. This isn’t a race; it’s a craft. Cut corners here, and you’ll pay for it later. I’ll walk you through the process as I would approach it on one of my projects to ensure a leak-proof shower.
Preparation is Key: Subfloor, Framing, and Drain Assembly
First off, your subfloor needs to be solid, level, and clean. Address any soft spots or structural issues now. Make sure your shower curb is built correctly – usually from 2x4s or 2x6s, well-fastened, and sturdy. Then, focus on your drain. Install the bottom half of the two-part clamping drain assembly, ensuring it’s flush with the subfloor and securely fastened. It’s crucial that the drain is set at the lowest point, ready to receive that pre-slope.
Pre-Slope Perfection: A Detail Too Many Skip
This is where you build your pre-slope. Mix up a batch of deck mud – a drier, sandier mortar mix. Starting at the drain, gently slope the mud outwards towards the walls, aiming for a pitch of 1/4 inch per foot. This means if your shower is 3 feet deep, the perimeter of the pre-slope should be 3/4 inch higher than the drain. Use a straight edge and a level to ensure an even, consistent slope.
This layer doesn’t have to be perfectly smooth; its job is just to guide water. Let it cure overnight. Trust me, getting this right prevents stagnant water and the associated odors down the road. A proper pre-slope is essential for effective shower waterproofing.
Cutting and Fitting: How to Get Those Corners Right
Now for the liner itself. Unroll your chosen CPE or PVC shower pan liner and let it relax. Cut a piece large enough to cover the entire shower pan, extending up the walls at least 9 inches from the finished shower floor height, and over the curb. I always add a few extra inches for good measure.
When it comes to corners, this is where many DIYers struggle. You need to create seamless folds, not cuts. If you cut the liner at the corners, you create potential leak points. I typically create a hospital corner fold, much like making a bed.
Push the liner into the corner, creating a neat fold that allows the liner to conform to the shape without cutting it below the top of the curb. Some pros prefer a diagonal cut at the corner above the top of the curb, but the key is to ensure no cuts go below the finished curb height or the finished height of the liner on the wall. For a continuous waterproof membrane, carefully fold and overlap the liner, sealing any seams. This requires patience and precision.
Folding and Fastening: The Details That Prevent Leaks
With the liner draped over the pre-slope and up the walls, carefully push it into all the corners and against the curb. Ensure it’s not stretched tight anywhere; you want it to lay relaxed. Fasten the liner to the studs above the finished height of the curb (or at least 6 inches above the finished shower floor, usually around 9-12 inches up the wall).
Use galvanized roofing nails or staples with plastic washers to prevent punctures. Remember, you’re only fastening it high up; the lower parts need to float freely, allowing water to drain.
Drain Connection: The Trickiest Part
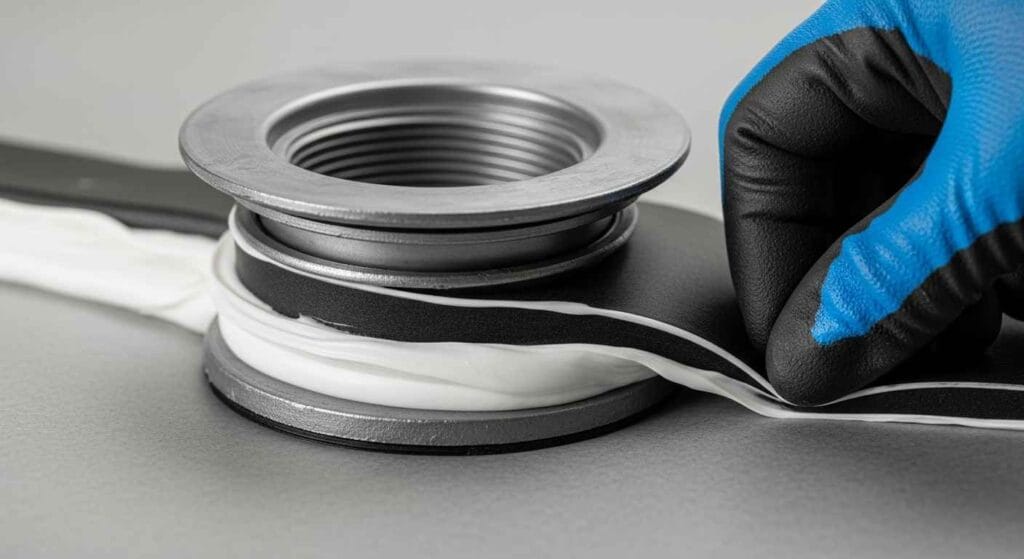
This is often the most critical point for leaks in a shower pan liner installation. Once the liner is in place, mark the center of the drain. Carefully cut out the drain hole, leaving about an inch of overlap around the drain opening. Apply a generous bead of plumber’s silicone sealant (specifically for shower pan liners, like Oatey’s) around the bottom flange of the drain. Push the liner down onto this sealant, ensuring it forms a watertight seal.
Then, install the clamping ring of the drain, tightening the bolts evenly. The clamping ring compresses the liner against the drain’s lower body, creating a mechanical and chemical bond that is absolutely vital. Make sure no folds or wrinkles are caught in the clamping mechanism. This shower drain connection needs to be perfect for a leak-proof shower.
The Water Test: Don’t Skip It!
You’ve done all that work, and now for the moment of truth. Before you lay your final mud bed or tile, plug the drain (you can buy a specific drain plug for this) and fill the pan with water. I recommend filling it to just below the top of the curb or your finished liner height on the walls. Let it sit for at least 24 hours, preferably 48. Check for any drops or wet spots on the ceiling below (if applicable) or along the outside of the curb.
If there are no leaks, you’ve done it right. If there are, you’ve caught it before tiling, saving yourself a monumental headache. This water test step is non-negotiable on every project I do to confirm shower waterproofing.
Post-Liner Work: Mud Bed and Tile
Once the water test is passed, you can install the final mortar bed (typically 1.5 to 2 inches thick at the drain, sloping to 1 inch at the perimeter, maintaining that 1/4 inch per foot pitch). This mud bed is what you’ll tile directly onto. Once that’s cured, you’re ready for the fun part: tiling your beautiful new shower.
Common Shower Pan Liner Installation Mistakes to Avoid
Even with the best intentions, I’ve seen good contractors and diligent DIYers make mistakes that compromise the integrity of the shower liner installation. Being aware of these common pitfalls can save you from a complete tear-out down the line.
Skipping the Pre-Slope
As I mentioned earlier, this is a huge one. Without a proper pre-slope, water will sit on top of the liner, stagnating and potentially causing mildew and odors. It’s a guaranteed return trip for me if it’s missed. Always pre-slope.
Punctures and Tears
The shower pan liner is durable, but it’s not invincible. Tools, dropped tiles, or even rough-edged boots can puncture it. During installation, constantly check for any damage. Even a small pinhole can become a significant leak over time. On a recent project, we discovered a tiny staple had barely nicked a liner.
It wasn’t leaking much, but it was enough to cause discoloration on the ceiling below. We caught it during the water test, thank goodness, but it meant replacing a section. Handle the liner with care.
Improper Drain Connection
This is the number one source of leaks I see with traditional pan liners. If the liner isn’t perfectly sealed and clamped into the drain, water will find its way out. Don’t skimp on sealant and ensure the clamping ring is tightened evenly and securely. No wrinkles, no gaps in your shower drain connection.
Not Extending High Enough
The shower pan liner needs to extend up the walls above the finished curb height or at least 9 inches from the finished shower floor. If it’s too low, water splashing high on the walls can wick past the liner. It’s better to go a bit higher than risk it.
Cold Seams or Poorly Adhered Seams
If you need to seam two pieces of liner together (try to avoid this if possible with larger rolls), use the manufacturer-recommended adhesive or tape system. These seams are often critical points. Follow the instructions to the letter and ensure the bond is strong and watertight. Never rely solely on overlapping without proper adhesive.
Shower Floor Systems: Beyond Traditional Pan Liners
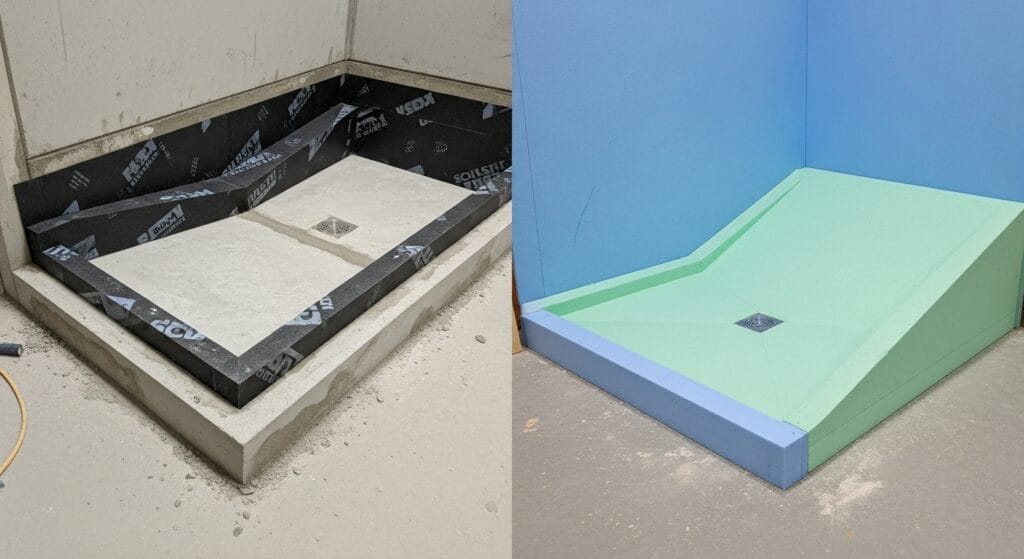
While the traditional shower pan liner is a robust and reliable system, it’s not the only way to build a shower floor. For those exploring alternatives or looking for a potentially simpler installation, there are other systems worth considering. These are often described as shower floor inserts or pre-formed bases.
Pre-formed Shower Pans: The Streamlined Choice
Pre-formed shower pans are factory-made units, typically constructed from materials like fiberglass, acrylic, or composite stone (e.g., Kohler, Swanstone, Maax). They come in standard sizes and shapes, with an integrated slope and drain opening.
Pre-formed shower pans offer faster installation, as there’s no need to build a custom mud pan or install a liner; you simply set the pan and connect the drain. The slope is guaranteed, being built-in and consistent, which eliminates potential errors with hand-troweled pre-slopes. They are also seamless, as the pan itself is a single, waterproof unit, reducing leak points and being less labor-intensive, which can significantly reduce labor costs if you’re hiring a professional.
However, pre-formed pans offer limited customization, as you’re stuck with standard sizes, shapes, and drain locations, making them not ideal for unique shower designs. While some are designed for tiling directly, many have finished surfaces (acrylic, fiberglass) that don’t offer the same design flexibility as a tiled shower. While saving on labor, the unit cost can sometimes be higher than raw materials for a traditional pan.
For a sleek, modern look that still allows for tiling, look into tile-ready shower pans like those from Schluter or Wedi. These are foam-based, pre-sloped, and designed to be tiled directly, offering the shower waterproofing of a pre-formed system with the design flexibility of tile.
Linear Drains & Integrated Systems: Modern Approaches
With the rise of modern design, linear drains and integrated shower waterproofing systems (like the aforementioned Schluter Kerdi or Wedi systems) have become very popular. These systems often utilize waterproof boards and membranes, allowing for curbless showers and larger format tiles.
While they still require careful waterproofing, they often simplify the pan construction and eliminate the need for a traditional flexible pan liner. They typically integrate a sloped foam base and a bonded fabric membrane. These are excellent choices if you’re aiming for a walk-in shower with a sleek, minimalist aesthetic.
When to Call a Pro: Recognizing Your Limits
Look, I’m all for homeowners taking pride in their work. But sometimes, especially with something as critical as shower waterproofing, knowing when to call in a professional is the smartest decision you can make. If the idea of cutting and folding a liner perfectly, making a seamless drain connection, or building a consistent pre-slope makes you nervous, that’s a sign.
The cost of fixing a leaky shower is exponentially higher than doing it right the first time. If you’re on the fence, get a few quotes. A good contractor with experience in shower pan liner installation can not only get the job done right but can also advise you on the best materials and systems for your specific bathroom and budget.
Frequently Asked Questions About Shower Pan Liners
Homeowners often have similar questions about these crucial components. Here are a few I hear all the time:
What’s the real difference between PVC and CPE liners?
The main difference comes down to their chemical composition and performance characteristics. PVC (Polyvinyl Chloride) liners are generally more rigid, especially in cooler temperatures, and are a budget-friendly option.
CPE (Chlorinated Polyethylene) liners offer superior flexibility, particularly when it’s cold, and have better resistance to chemicals and mold, making them a more durable and often preferred choice for long-term performance, even if they cost a bit more upfront. From my experience, CPE handles better and lasts longer for shower waterproofing.
How long can I expect my shower pan liner to last?
A properly installed shower pan liner, whether PVC or CPE, should last for at least 20-30 years, and often longer. The longevity greatly depends on the quality of the material, the meticulousness of the installation (especially the drain connection and lack of punctures), and the presence of a proper pre-slope to prevent water stagnation.
A liner that’s punctured or incorrectly installed, however, could fail in a matter of months or a few years, leading to a leaky shower.
Can I really install a shower pan liner as a DIY project?
Yes, it is possible for a dedicated and skilled DIYer to install a shower pan liner, but I wouldn’t call it a beginner-level project. It requires patience, precision, a good understanding of shower waterproofing principles, and attention to detail, especially around the drain and corners.
If you’re comfortable with detailed, exacting work and are prepared to do thorough research and practice, you can tackle it. However, if you’re unsure or inexperienced with critical waterproofing tasks, I strongly recommend hiring a professional. The consequences of a failed liner are severe and expensive.
Do I absolutely need a pre-slope under my shower liner?
Yes, you absolutely need a pre-slope under your shower liner. This is one of the most fundamental requirements for a healthy, long-lasting shower. The pre-slope ensures that any water that penetrates through the tile and mortar bed drains efficiently through the weep holes in your shower drain, preventing it from pooling and stagnating on top of the liner.
Skipping this step is a recipe for mold, mildew, and unpleasant odors under your shower floor, compromising the entire shower waterproofing system over time.
Is a liquid membrane a viable alternative to a traditional liner?
While liquid applied membranes are excellent shower waterproofing solutions for shower walls, benches, and curbs, and can be used for shower pans, they are typically applied over a pre-sloped mortar bed rather than replacing the structural role of a flexible pan liner in a traditional build. They create a fantastic seamless barrier when used as part of a complete system (like over a sloped concrete slab or a pre-sloped foam board).
For a traditional mud-bed shower, a flexible shower pan liner is generally still considered the primary waterproofing layer for the pan itself due to its thickness and robustness. Always follow the manufacturer’s specific instructions for any liquid membrane system, as application methods and suitability for pans can vary.
Your Watertight Foundation: Making the Right Choice
Choosing the right shower pan liner and ensuring its flawless installation is perhaps the most critical part of building a shower that lasts. It’s the invisible work that protects your visible investment. Whether you opt for a traditional PVC or CPE liner, explore modern pre-formed systems, or delve into advanced integrated shower waterproofing, your goal remains the same: a perfectly watertight enclosure and a leak-proof shower.
Don’t let the technical details intimidate you. Take your time, do your research, and don’t be afraid to invest in quality materials and skilled labor. A little extra effort and expense on the front end will save you from monumental headaches and costs down the road.
If you’re serious about your bathroom renovation, understanding these elements empowers you to make informed decisions that ensure your shower remains a source of relaxation, not regret. Ready to make some smart choices and ensure your shower pan liner installation is perfect? Consider getting a few material quotes, or better yet, reach out to an experienced local contractor for a detailed consultation and estimate tailored to your project. Your home—and your peace of mind—will thank you for it.
Investing in a quality teak shower bench is a decision you will undoubtedly appreciate. It introduces an element of natural beauty, significantly enhances functionality, and offers a level of durability that few other materials can rival in a demanding environment like a shower.
By understanding the different grades of teak, carefully selecting between freestanding and wall-mounted options, and committing to simple, consistent maintenance, you will ensure your wooden shower bench remains a reliable and attractive fixture in your bathroom for decades to come.
Take your time, make an informed choice, and enjoy the lasting benefits of a truly well-made piece. If you’re undertaking a larger bathroom remodel and have questions about integrating a bench or any other aspect, don’t hesitate to consult with a seasoned professional for expert guidance.