





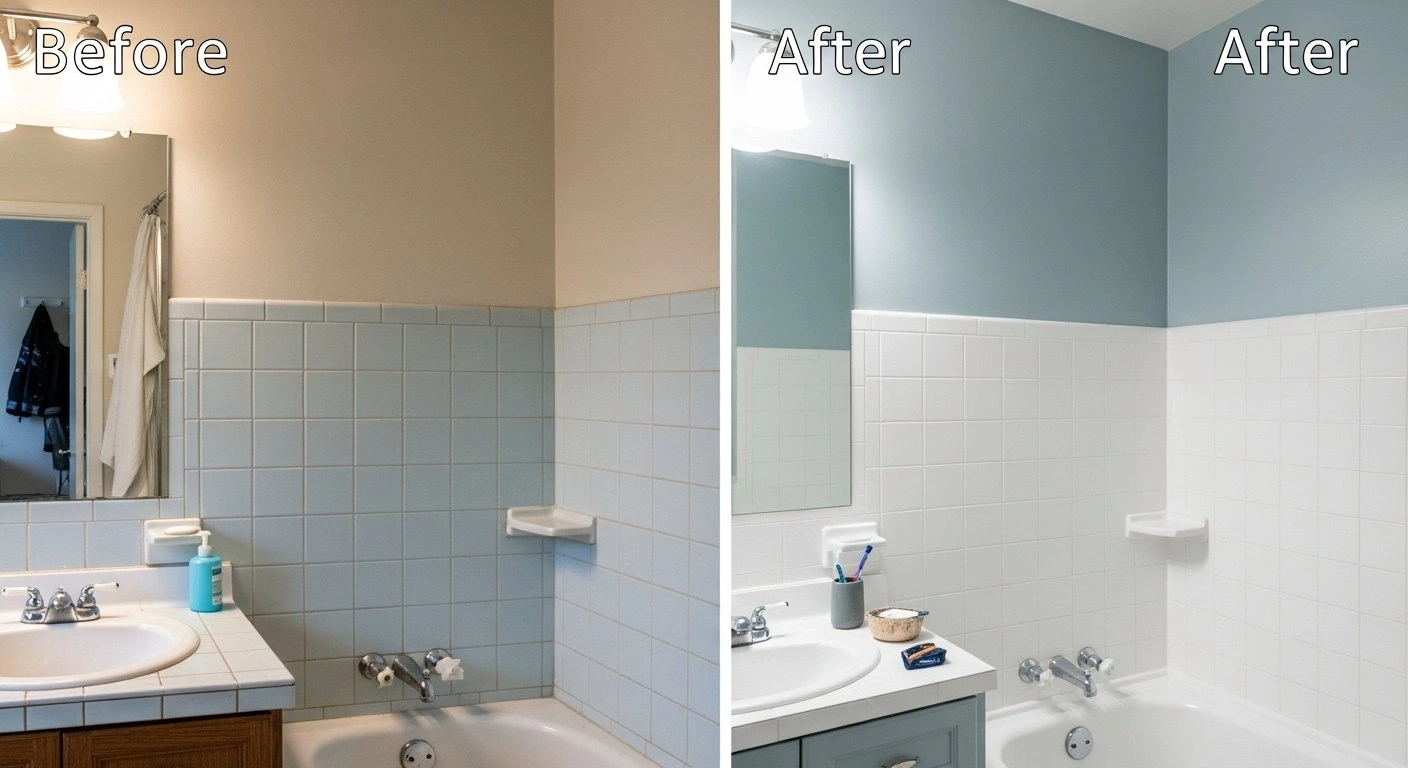

Alright, let’s get straight to it. One of the most common questions I get asked by homeowners looking to refresh their bathrooms without a full-blown demolition is, “Can I paint my bathroom tile?” And my straightforward answer, based on years of experience, is yes, you absolutely can. But here’s the kicker: just because you “can” do something doesn’t always mean you “should”, or that it’s going to be a walk in the park.
- Step-by-Step Guide: How to Paint Bathroom Tiles for Lasting Results
- Choosing the Best Paint for Bathroom Tile: Contractor Product Recommendations
- Critical Surface Preparation: The Foundation for Durable Painted Bathroom Tiles
- Common Mistakes to Avoid When Painting Bathroom Tile
- Longevity of Painted Bathroom Tiles: Realistic Expectations
- Final Thoughts from the Job Site
Painting bathroom tile is a legitimate way to transform a dated space, but it’s a project that demands proper technique, the right materials, and a healthy dose of patience. Skimp on any of these, and you’ll be calling me back in a year to fix a peeling mess. I’ve seen it countless times.
The key to success isn’t just slapping on a coat of paint. It’s understanding the science behind adhesion, the demands of a high-moisture environment, and the importance of a meticulous process. Over the years, I’ve seen some truly remarkable transformations with painted tile, holding up beautifully for years, while others have failed miserably within months.
The difference almost always comes down to preparation and product choice. We’re talking about a surface that needs to withstand water, humidity, cleaning products, and foot traffic. It’s a lot to ask of paint, but with the right approach, it’s achievable. Let’s dive into what it really takes to get it right, because my goal is always to help you avoid the common headaches I’ve witnessed when painting bathroom tile.
Step-by-Step Guide: How to Paint Bathroom Tiles for Lasting Results
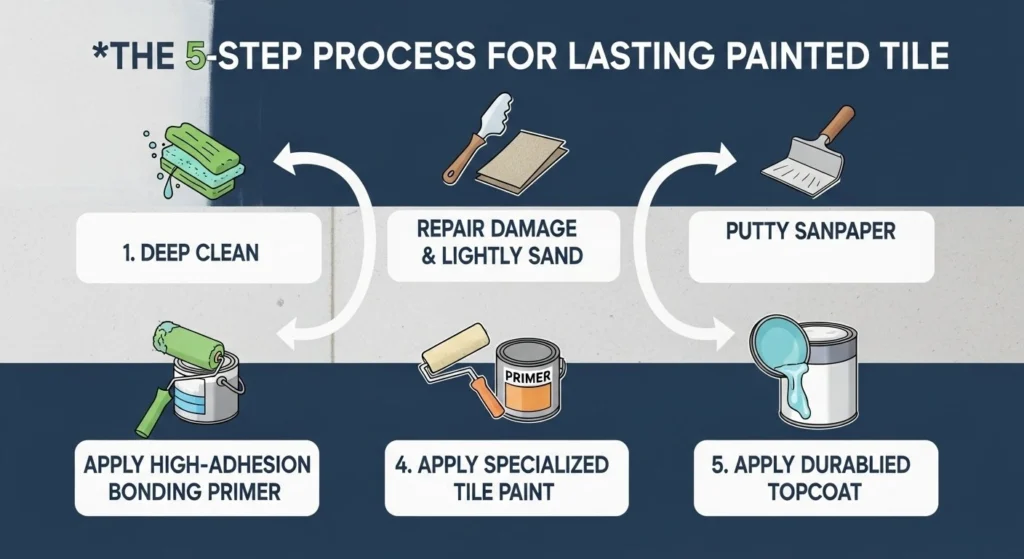
When I’m advising folks on painting their bathroom tile, I stress that this isn’t a quick weekend project if you want lasting results. Think of it as a multi-day commitment. The process I outline here is what I’ve found yields the most durable finish, mirroring the professional standards we apply, even if we’re not technically “painting” tile in a large-scale renovation. It’s all about building a strong foundation, layer by layer.
Deep Cleaning is Paramount
First, deep cleaning is paramount. And I mean “deep” cleaning. You need to remove every speck of dirt, grease, soap scum, and mildew. I typically recommend a heavy-duty degreaser like Krud Kutter or TSP (trisodium phosphate) cleaner. Mix it according to the manufacturer’s instructions, then scrub the tiles and grout lines with a stiff brush. Don’t just wipe; really get into those grout lines.
After scrubbing, rinse the entire surface thoroughly with clean water, multiple times if necessary, to ensure no cleaner residue remains. Let it dry completely. This might sound obvious, but I’ve seen people rush this, and it always comes back to bite them. Residue is the enemy of adhesion.
Repair Damage and Lightly Sand the Tiles
Next, you need to repair any damage and lightly sand. Inspect your tiles for cracks, chips, or crumbling grout. These small imperfections will show right through the paint, so address them now. Use a good quality epoxy filler for chips, and re-grout any failing sections. Once repairs are dry, a light sanding with 220-grit sandpaper is crucial.
You’re not trying to remove the glaze, just scuff it up slightly to give the primer something to grip onto. This step is often skipped by DIYers, but trust me, it’s a non-negotiable for proper adhesion. After sanding, vacuum up all dust and wipe down the tiles with a tack cloth or a damp cloth followed by a dry one, ensuring no sanding dust is left behind.
Apply a High-Adhesion Bonding Primer
Then comes priming. This is where many DIY projects go wrong. You can’t just use any primer. You need a high-adhesion bonding primer specifically formulated for slick surfaces. My go-to is usually an oil-based primer like Zinsser B-I-N Shellac-Based Primer or Kilz Adhesion.
These primers create an incredibly strong bond to the tile. Apply two thin coats with a high-quality roller, allowing adequate drying time between coats as per the manufacturer’s instructions. Don’t rush this stage; primer cure time is just as important as paint cure time.
Apply Specialized Tile Paint and a Durable Topcoat
Finally, it’s time for the paint and topcoat. Once the primer is fully cured, apply your chosen tile paint. I typically recommend two to three thin coats for optimal coverage and durability, again allowing full drying time between each coat. Once your final paint coat is dry, you’ll need to apply a clear, water-resistant topcoat.
This clear coat acts as a shield, protecting your painted surface from water, abrasion, and cleaning chemicals. Look for a clear epoxy sealant or a durable polyurethane specifically designed for high-traffic or wet areas. Two coats are usually sufficient. This entire process, from cleaning to final topcoat, is painstaking, but it’s the difference between a temporary fix and a lasting upgrade for your painted bathroom tile.
Choosing the Best Paint for Bathroom Tile: Contractor Product Recommendations
Selecting the correct paint for your bathroom tiles is perhaps the most critical decision you’ll make, right after nailing the preparation. You simply cannot grab any old interior wall paint and expect it to hold up in a bathroom environment. It just won’t. I’ve seen that mistake lead to peeling and chipping within weeks. For ceramic and porcelain tiles, you need something specifically engineered for adhesion to slick, non-porous surfaces and capable of withstanding moisture and wear.
My recommendation almost always leans towards epoxy-based paints or high-quality acrylic latex enamels specifically designed for tile or cabinets/trim that can be reinforced with a topcoat. Epoxy paints are generally my first choice for areas that will see a lot of water exposure, like shower surrounds or floors.
Products like Rust-Oleum Tub & Tile Refinishing Kit are popular for a reason. They’re a two-part epoxy system that creates an incredibly hard, durable, and waterproof finish. The drawback is they can be a bit trickier to work with, have a strong odor, and require precise mixing and application within a limited pot life. But when done right, the results are phenomenal.
For less intensive areas, say a bathroom backsplash or wall tiles not directly in a shower, a premium acrylic latex enamel with an excellent bonding primer can work. Look for paints labeled for cabinets, doors, or trim, as these are formulated for durability and adhesion. Brands like Benjamin Moore Advance or Sherwin-Williams Urethane Alkyd Enamel are solid choices.
These aren’t just your standard wall paints; they contain urethane or alkyd resins that make them much harder and more resistant to scuffs and moisture. Even with these, I’d still follow up with a clear, water-based polyurethane topcoat for added protection, especially if it’s a high-use area.
Never underestimate the power of the primer. Even with the best paints, a bonding primer is non-negotiable. It creates that crucial intermediary layer that grabs onto the tile’s slick surface and provides a roughened, receptive base for your paint. As I mentioned earlier, Zinsser B-I-N or Kilz Adhesion are staples in my truck for a reason.
The paint itself provides the color and initial durability, but the system – primer, paint, and topcoat – works together to ensure longevity. Don’t cheap out on any component of this system. Investing in quality products here will save you a world of headaches down the line. It’s truly not just about the paint; it’s about the entire coating system working in harmony to make your painted tile last.
Critical Surface Preparation: The Foundation for Durable Painted Bathroom Tiles
If you take one piece of advice from this old contractor, let it be this: surface preparation is not merely a step; it is the entire foundation of your project.
I can’t emphasize this enough. Over the decades, I’ve seen countless DIY tile painting attempts fail, and almost every single time, the culprit was inadequate preparation. You can use the most expensive, best-performing paint on the market, but if the surface isn’t prepped perfectly, it will fail. Period. Think of it like building a house on sand – it doesn’t matter how strong the house is if the ground beneath it isn’t stable.
My process starts with a hyper-vigilant cleaning. We’re talking about removing every speck of dirt, grease, oil, soap scum, and mold or mildew. For me, this means getting down on my hands and knees with a stiff-bristled brush and a heavy-duty cleaner.
My go-to is usually a solution of TSP (trisodium phosphate), following the manufacturer’s dilution instructions carefully. It’s a powerful degreaser and cleaner that cuts through years of buildup. For those looking for something a little less aggressive, a product like Krud Kutter works wonders too.
Scrub every tile and, crucially, every grout line. Don’t forget the grout; it often harbors the most stubborn grime. After scrubbing, rinse, rinse, and then rinse again with clean water. You need to ensure absolutely no cleaner residue is left behind, as that will interfere with adhesion. I’ll often wipe the surface with a damp cloth a few times, then a dry one, just to be sure. Let the entire area dry for at least 24 hours, often longer in a humid bathroom, to ensure no moisture is trapped.
Once clean and bone-dry, the next critical step is to repair and smooth. Any cracks, chips, or pitted grout needs to be fixed. For small chips in tiles, an epoxy-based filler is excellent. For failing grout, carefully scrape out the old, crumbling sections and re-grout.
Allow all repairs to fully cure according to their instructions. Then, and this is another step often overlooked, a light sanding. We’re not trying to strip anything bare; we’re simply “etching” the surface. Use 220-grit sandpaper or a sanding sponge. The goal is to create microscopic scratches that give the primer something to really grab onto.
This step is especially vital for highly glazed, slick tiles. After sanding, vacuum thoroughly to remove all dust, then wipe down the entire surface with a tack cloth. A lint-free cloth dampened with denatured alcohol can also work wonders to pick up any remaining microscopic dust and degrease one last time before priming. This level of meticulousness in preparation is what separates a successful, long-lasting painted tile job from one that starts peeling within months.
Common Mistakes to Avoid When Painting Bathroom Tile
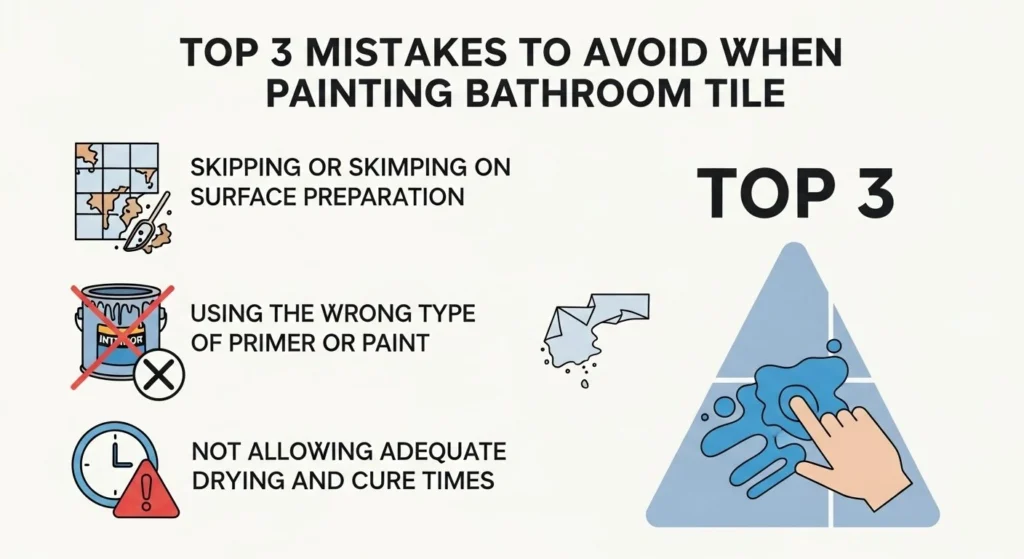
After years in this trade, I’ve developed a keen eye for where projects go sideways. When it comes to painting bathroom tile, there are a few recurring mistakes I consistently see homeowners make, and they almost always lead to disappointment. Knowing these ahead of time can save you a lot of grief, time, and money.
One of the biggest blunders is skipping or skimping on surface preparation. As I’ve said, this is the cornerstone of the whole operation. People often think a quick wipe-down is enough. It isn’t. Grease, soap scum, mildew, and invisible residues act as bond breakers, preventing the primer and paint from adhering properly.
I’ve walked into bathrooms where the paint is literally peeling off in sheets because the tiles weren’t thoroughly cleaned and degreased. Another oversight in prep is neglecting to lightly scuff sand the tile glaze. That incredibly smooth, glossy finish on ceramic and porcelain tile is exactly why paint struggles to stick. A light sanding creates the mechanical adhesion needed for the primer to bond effectively.
Another common mistake is using the wrong type of primer or paint. Folks often get tempted to use an all-in-one product or a standard interior paint, thinking it’ll be fine. It won’t be. Bathroom environments are brutal on paint due to high humidity, temperature fluctuations, and direct water exposure.
You need a specialized high-adhesion bonding primer (like a shellac-based or high-quality epoxy primer) and then an epoxy-based tile paint or a durable enamel with a strong topcoat. Using anything less means you’re just applying a temporary cosmetic layer that won’t stand up to the daily demands of a bathroom. I’ve even seen people skip the clear protective topcoat, which is vital for sealing the surface and protecting the color coat from abrasion and moisture.
Not allowing adequate drying and cure times is another major pitfall. Patience is a virtue in painting, especially with multi-coat applications on non-porous surfaces. Each coat of primer, paint, and topcoat needs to fully dry, and more importantly, fully “cure”, before the next one is applied or before the surface sees any use. Drying means the solvents have evaporated; curing means the paint has reached its maximum hardness and durability. Rushing this can trap moisture, lead to bubbling, or result in a soft finish that’s prone to scratches and peeling.
Always follow the manufacturer’s recommendations, and often, adding a little extra time, especially in humid conditions, is a wise move. I typically tell clients to add an extra day or two to the cure time before reintroducing water. A painted shower, for instance, might need 5-7 days of curing before its first shower. Don’t rush it; your hard work depends on it.
Longevity of Painted Bathroom Tiles: Realistic Expectations
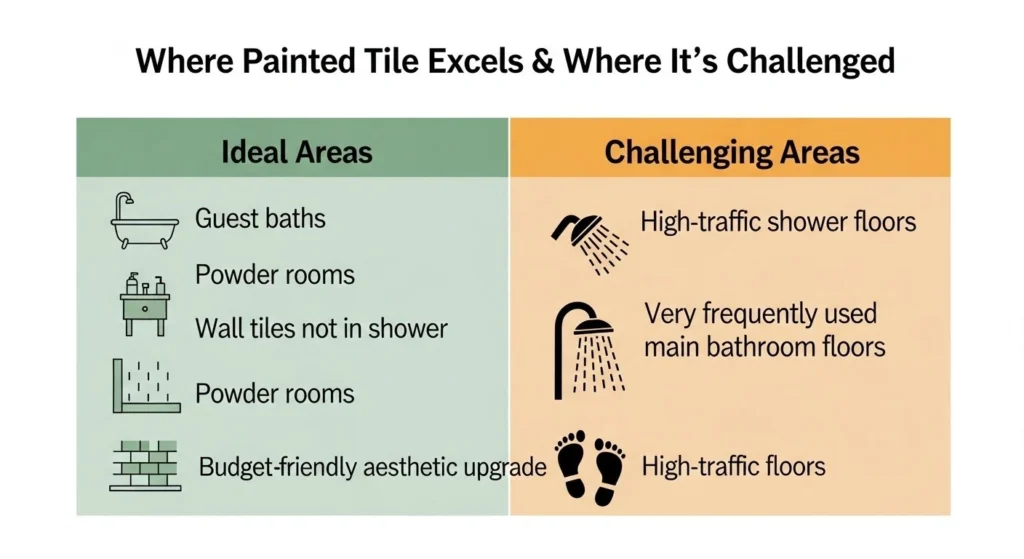
This is where I always get brutally honest with homeowners. When you ask me, “How long does painted bathroom tile last?” my answer will always be, “It depends, but don’t expect it to last forever like new tile.” While painting tile can deliver a fantastic, cost-effective makeover, it’s not the same as tearing out and installing brand-new, glazed ceramic or porcelain. Expecting decades of flawless wear from painted tile, especially in high-traffic or wet areas, isn’t realistic.
In my experience, a properly prepped and painted tile surface in a low-traffic area, such as wall tiles on a bathroom backsplash or behind a toilet (areas that don’t get direct water spray or foot traffic), can last a good 5 to 7 years, or even longer, with proper care. These areas typically see less abuse from cleaning and wear, allowing the paint and topcoat to perform optimally. I’ve seen some hold up remarkably well for a decade, but those are usually in guest bathrooms or powder rooms with minimal use.
Now, let’s talk about floors and shower surrounds. This is where the durability question becomes much more challenging. Bathroom floors, particularly in a main bathroom, endure constant foot traffic, abrasive dirt, and frequent cleaning. In these scenarios, even with the best epoxy systems, I typically advise homeowners to expect a lifespan of 2 to 3 years before noticeable wear and tear begins.
The grout lines, which are recessed, tend to fare better, but the flat surface of the tile takes a beating. For shower tiles, which are exposed to daily hot water, steam, soap, and scrubbing, the lifespan can be even shorter, perhaps 1 to 2 years before you might start seeing some localized peeling or dulling. The constant moisture and temperature changes are incredibly taxing on any painted surface.
The longevity is highly dependent on several factors: the quality of the products used (primer, paint, and topcoat), the meticulousness of the preparation, the specific location of the tiles (floor vs. wall, dry area vs. wet area), and how well the painted surface is maintained.
Using non-abrasive cleaners and avoiding harsh scrubbing will significantly extend its life. In essence, think of painted tile as a really good, long-term cosmetic upgrade rather than a permanent solution. It’s an excellent way to breathe new life into an outdated bathroom for a fraction of the cost of re-tiling, but understanding its limitations will help you manage your expectations and enjoy the transformation for what it is.
Final Thoughts from the Job Site
Painting bathroom tile isn’t a miracle cure, but it’s a perfectly viable and effective strategy for refreshing a tired space on a budget. The most important lesson I can pass on from years of seeing what works and what doesn’t is this: don’t cut corners. Every step, from the intense cleaning to the diligent priming and careful application of specialized paint and topcoat, is there for a reason. Rush any part of it, and you’re simply setting yourself up for disappointment down the road.
If you commit to doing it right, follow these guidelines, and manage your expectations about longevity, you can achieve a truly stunning transformation. It’s about smart choices, meticulous effort, and using the right products for the job. You’ll be amazed at the difference a fresh coat can make.
Is painting bathroom tile a good idea for every bathroom?
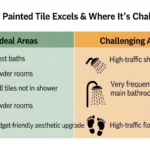
It’s a good idea for many bathrooms, especially if you’re looking for a budget-friendly aesthetic upgrade without the mess and expense of a full re-tile.
However, I usually advise against it for high-traffic shower floors or very frequently used main bathroom floors, where durability is a primary concern. It shines in guest baths, powder rooms, or for wall tiles not directly in the shower.
Can you paint shower tiles?
Yes, you can paint shower tiles, but it requires the most diligent preparation and the most robust, two-part epoxy-based paint systems. Even then, managing expectations is key. The constant water exposure and scrubbing will challenge the paint’s longevity more than any other area. I always recommend a very thorough cure time—at least 5-7 days—before the first shower.
How do I maintain painted bathroom tiles?
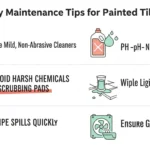
Maintenance is fairly straightforward but crucial for longevity. Use mild, non-abrasive cleaners. Avoid harsh chemicals, scrubbing pads, or scouring powders, as these can easily damage the painted finish.
A soft cloth or sponge with a gentle, pH-neutral cleaner is usually sufficient. Wipe up spills quickly and ensure good ventilation to reduce humidity.
What if I don’t like the painted tile later? Can it be removed?
Yes, painted tile can be removed, but it’s not a simple wipe-off. You’d typically need to sand it down or use paint stripper, which can be a time-consuming and messy process.
In some cases, if the paint has bonded incredibly well, removing it completely might be as labor-intensive as grinding it down or even chipping out the old tiles. It’s why I stress getting it right the first time!