


Alright, someone asked me to write all this down. So here we are. Brass. It’s got a certain weight to it, you know? Real heft. Not like that cheap plated junk from the big box stores. A good brass towel bar can make a whole bathroom look… finished. It’s the last thing you do and it pulls it all together.
- The Timeless Appeal of Polished Brass Towel Bars
- Understated Elegance: Matte and Brushed Brass Towel Bar Designs
- Why a Wall Mounted Brass Towel Bar is the Gold Standard
- How to Install Your Brass Towel Bar Like a Pro
- Creating a Cohesive Look with Modern Brass Bathroom Hardware
- Your Perfect Brass Towel Bar Awaits
But boy, can people mess it up.
I’ve been doing this since ‘98. I’ve seen some things. Wrong finishes that look weird after a year, shaky installations… just fixed one last week for a woman over on Sinclair. Her kid yanked on the towel and a whole chunk of drywall came out with the bar. Total disaster.
So this is me, telling you how to do it right. It’s not just about a couple of screws. It’s about picking the right thing in the first place and making sure it never, ever moves again.
The Timeless Appeal of Polished Brass Towel Bars
Polished brass. That’s the one everybody knows. It’s that super shiny, almost-gold look you see in fancy hotels or old-school bathrooms with white subway tile. It’s a classic, I get it. It bounces the light around. Makes a room feel a little brighter.
The thing you gotta get straight in your head is lacquered vs. unlacquered. This is the big one.
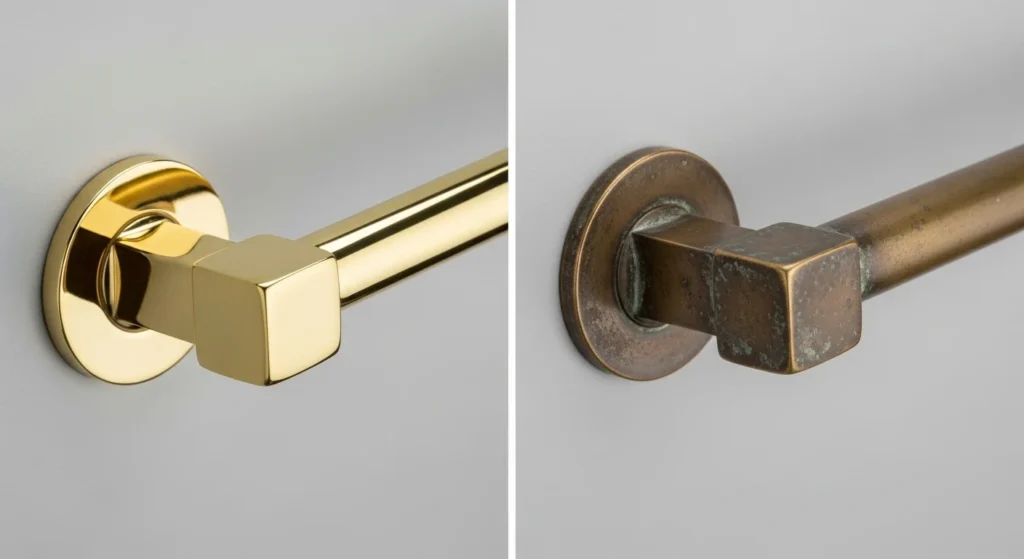
Most polished brass towel bar fixtures you buy, especially from the big brands, are lacquered. Think of it like a clear coat on a car. It’s a protective layer baked on there so it doesn’t tarnish. It just stays shiny. Forever. You wipe it with a cloth and you’re done.
Then there’s unlacquered brass. That’s just… naked brass. It’s a living finish, which is a fancy way of saying it’s going to change. It’ll get darker, get fingerprints, develop a whole patina. Some designers love this. They want that old, authentic look. But it’s a choice. You have to want that.
Because if you buy unlacquered thinking it’ll stay mirror-shiny forever, you’re gonna have a bad time. Just know what you’re getting into.
Look, this is the number one thing people get wrong. Let’s break it down so it’s simple.
| Finish Type | What It Does | The Catch |
|---|---|---|
| Lacquered Brass | Stays mirror-shiny forever. | The clear coat can be scratched by harsh cleaners. |
| Unlacquered Brass | Ages naturally, develops a dark patina. | It will never look new again, and it shows every touch. |
My Take: For 9 out of 10 people, lacquered is the way to go. It’s zero-headache. Only pick unlacquered if you truly love that aged, antique look and don’t mind the upkeep.
Understated Elegance: Matte and Brushed Brass Towel Bar Designs
The new thing is the softer finishes. Matte, satin, brushed… every company has a different name for it but it’s all basically the same idea: not shiny. And yeah, they look good. More modern. Plus, they don’t show every single water spot and fingerprint, which is a bonus. Looks great against dark paint colors or wood.
Brushed brass is pretty much the same deal, but it has tiny little lines in it. From a wire brush, obviously. You can barely see them unless you’re up close. Some of those big brands, like Delta, they have their own versions like Champagne Bronze that are everywhere now.
Here’s the problem. And it’s a big one.
The satin brass from one company will not match the satin brass from another company. Not even close. One will be yellow-gold, the other will be more like a pale brown. It’s a nightmare. I had a job in one of those new builds out past the airport, the client bought her faucet and towel bar online from two different places. Supposedly the same finish. We held them up next to each other and… nope. Just don’t do it.
If you’re going with these finishes, buy your brushed brass towel bar and your faucet and your toilet paper holder from the exact same company. The same collection, even. Or you’ll be sorry.
Why a Wall Mounted Brass Towel Bar is the Gold Standard
Look, just get a wall-mounted one. Don’t even bother with the other stuff. The over-the-door hangers are for college kids and the freestanding racks just get knocked over. A proper wall mounted brass towel bar is a real fixture. It’s part of the house.
When you’re shopping, pick it up. It should have some weight to it. Feel it. A good one is solid brass, not a hollow tube with a fake finish that’ll chip off. The parts that screw into the wall should feel heavy and tough. If it feels flimsy in the box, it’ll feel flimsy on your wall.
And think about the size. An 18-inch bar is basically for a hand towel. You can’t properly hang a full-size bath towel on it. It’s always bunched up, never dries right.
Get the 24-inch.
Seriously. It’s just more useful, especially in the main bathroom where you’ve got a couple of big towels. Some of the new ones are even double bars, which is a good idea. The point is strength. It has to hold a couple of heavy, wet towels without you ever worrying about it.
How to Install Your Brass Towel Bar Like a Pro
The little paper instructions in the box are a joke. They’re written by someone who has clearly never seen a real wall in their life. A wobbly towel bar is probably the number one most common homeowner mistake I get paid to fix.
Tools and Preparation
First, tools. Get them all before you start. You need a level. A real one, not an app on your phone. A pencil, tape measure, drill, and a stud finder.
Don’t guess where it should go. Measure it. About 48 inches off the floor is pretty standard, but adjust for your family. The most important thing here? Use that stud finder. Your goal, your dream, is to screw at least one side of the bar directly into a wall stud. That’s the gold standard.
The Drywall Installation
Okay, so you can’t hit a stud on both ends. It happens. This is where everyone goes wrong. You absolutely MUST use good wall anchors.
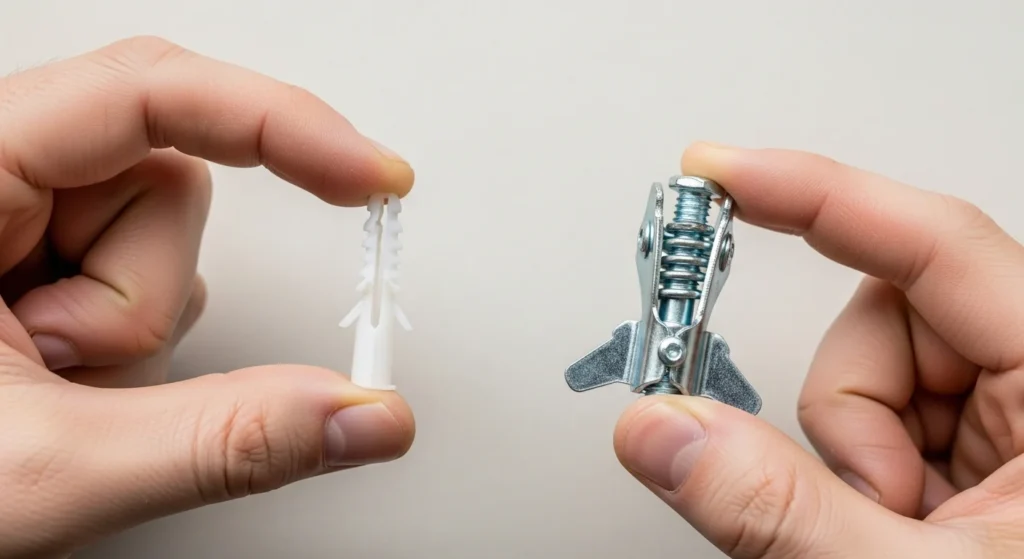
And those little cheap plastic ones that come in the package? Throw them directly in the garbage. They are worthless. They are the reason things fall off walls.
Go buy toggle bolts or the heavy-duty threaded kind that screw into the drywall. They cost a couple of bucks and they actually work. They grip the back of the drywall. Then, use the drill bit size it says on the package for the anchor. Not a size bigger. I once fixed a wall for a guy, I think it was Bob, who just grabbed a huge bit and hogged out the hole. The anchor just spun around and made a mess. Don’t be Bob.
To really drive this point home, let’s put the junk they give you side-by-side with the stuff you should actually buy.
| Anchor Type | How It Works (or Doesn’t) | My Verdict |
|---|---|---|
| The cheap plastic ones in the box | They just expand slightly in the drywall. A little bit of weight pulls them right out. | Garbage. |
| Toggle Bolts / Threaded Anchors | They expand behind the drywall, grabbing a wide area for massive holding power. | The Only Way. |
My Take: Spending three extra dollars on good anchors is the cheapest insurance you’ll ever buy. Just do it. Throw the other ones away the second you open the box.
Tackling Tile and Other Tricky Surfaces
Drilling into tile scares people. It shouldn’t. You just need the right tool for the job. You can’t use a regular drill bit. It’ll skate all over the place and you might crack the tile. You need a glass-and-tile bit, or one with a diamond tip.
Put a piece of painter’s tape on the tile where you want to drill. X marks the spot. It gives the drill bit a place to bite.
Then you drill. Go slow. And I mean slow. Let the drill do the work, don’t push on it. You can even keep a little cup of water to dip the bit in to keep it from getting too hot. Once you pop through the tile, you’re into the backer board behind it, and you can put your anchor in. That’s all there is to it. Just patience.
Creating a Cohesive Look with Modern Brass Bathroom Hardware
The brass towel bar is just part of it. You’ve also got the faucet, the cabinet pulls, the toilet paper holder, the light fixture… and if they don’t talk to each other, the whole room feels off.
Like I said before, the easiest way is to buy everything from the same brand’s collection. Done. Guaranteed match.
But everyone wants to mix metals these days. You can do it. You just have to be smart about it. Don’t throw five different finishes in one bathroom, it’ll look like a junk drawer. Pick two, maybe three tops.
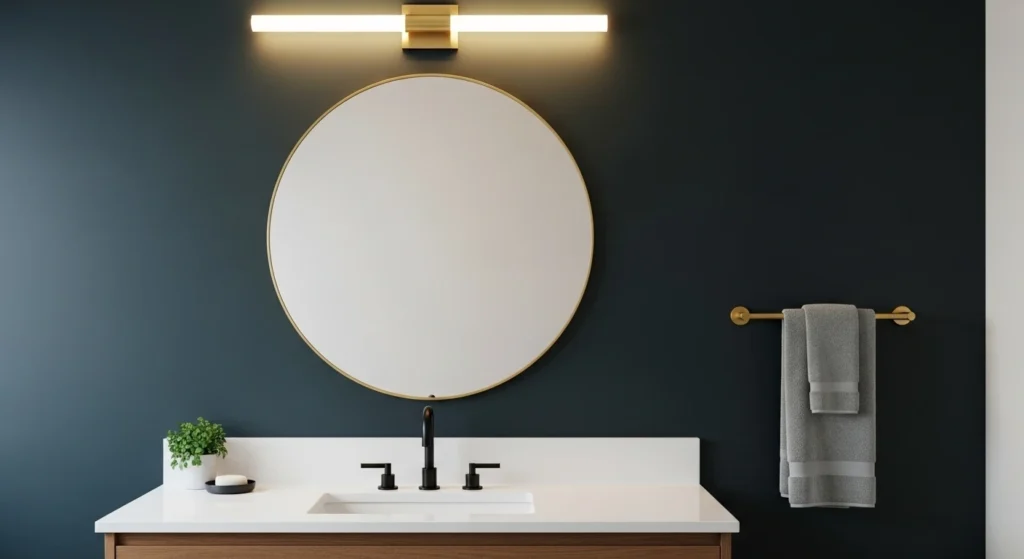
A common way to do it that actually looks good: use one finish for the main things, like matte black for the faucet and shower trim. Then use your brass for all the accessories. The towel bar, the mirror, the light. That looks intentional. It looks like you meant to do it.
That’s the secret. It just can’t look like an accident.
This whole ‘mixing metals’ thing can get confusing. Here’s a simple cheat sheet on how to do it so it looks like you hired a designer.
| The Approach | Does It Work? | Why? |
|---|---|---|
| All one finish, same collection | Always. | It’s a guaranteed, no-brainer match. Easiest way to look professional. |
| Two different finishes | Usually. | Looks intentional if you keep one for plumbing and the other for accessories. |
| Three or more finishes | Almost Never. | It starts to look messy and accidental, like a collection of random parts. |
My Take: The safest bet that always looks great is the two-finish rule. Black for the plumbing, brass for the accessories. It’s a classic for a reason.
Your Perfect Brass Towel Bar Awaits
So that’s it. That’s the whole story. Pick a solid one, decide if you want shiny or old-looking, and attach it to the wall so it never moves.
It’s not complicated. Just requires a little bit of thought.
Do it right and you’ll never have to think about it again. It’ll probably outlast the toilet.