





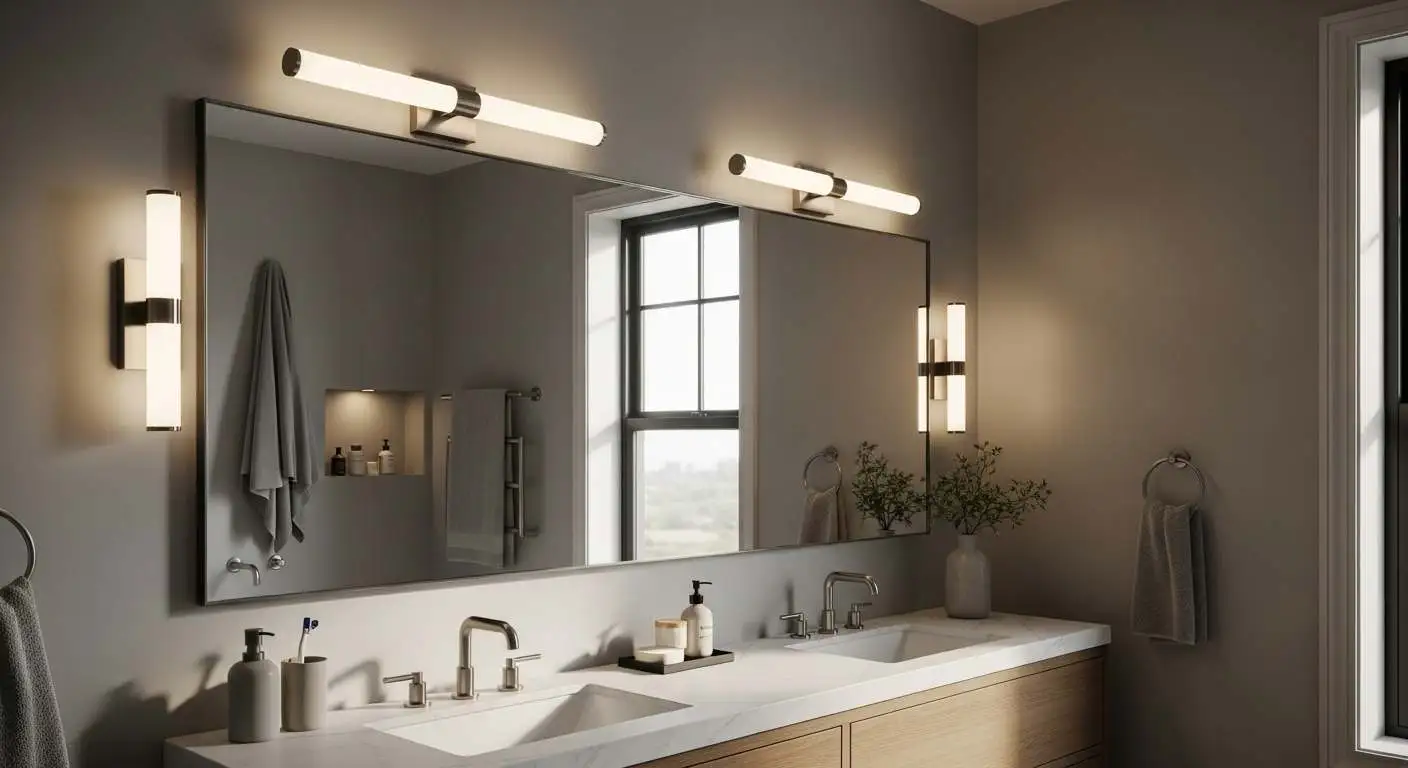

When you’re tackling a bathroom renovation, there are a lot of decisions to make, and it’s easy to get overwhelmed. As someone who’s been knee-deep in countless bathroom projects, I can tell you that one of the most impactful choices you’ll make is your bathroom vanity light fixtures. This isn’t just about throwing some light on the mirror. It’s about creating a functional, inviting space where you can start and end your day feeling good.
- Understanding the Best Types of Bathroom Vanity Light Fixtures
- Choosing the Right Size and Placement for Your Bathroom Vanity Light Fixtures
- LED vs. Traditional Bulbs: Making the Smart Choice for Bathroom Vanity Light Fixtures
- Navigating Modern vs. Classic Styles in Bathroom Vanity Light Fixtures
- Crucial Installation Tips for Your Bathroom Vanity Light Fixtures
- Conclusion
Poor lighting can make a beautiful new bathroom feel harsh or dim, impacting everything from your morning routine to the overall ambiance. We’ve all seen those bathrooms where the lighting casts unflattering shadows, making a simple task like shaving or applying makeup a real challenge.
My goal here is to share practical insights from the field. I want to help you navigate the options and avoid common mistakes, ensuring your new vanity lights enhance your bathroom for years to come.
Understanding the Best Types of Bathroom Vanity Light Fixtures
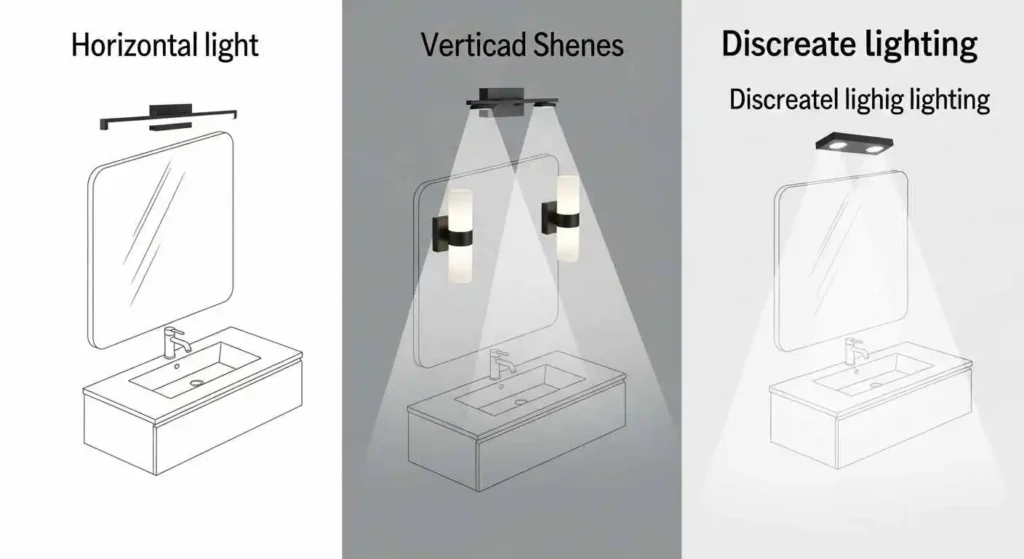
First off, let’s talk about the main players in the world of bathroom vanity light fixtures. You’ve got a few popular configurations, each with its own benefits and aesthetic appeal. Knowing these helps you visualize what works best in your space and with your existing or planned decor. We often guide homeowners through these choices, considering both function and form.
Bar Lights and Their Versatility
The most common type you’ll encounter is the bar light, which mounts horizontally above the mirror. These come in various lengths, typically housing multiple bulbs. They provide a broad, even wash of light, excellent for general illumination and reducing harsh shadows when positioned correctly.
I’ve worked with plenty of clients who appreciate the simplicity and effectiveness of a well-chosen bar light. Brands like Kichler, Progress Lighting, and Quoizel offer extensive collections, from minimalist chrome bars to more ornate, multi-light designs.
It’s crucial to match the fixture’s length to the width of your vanity or mirror for a balanced look. Going too short looks awkward and won’t provide enough light across the entire vanity area.
Sconces: The Symmetrical Choice
Sconces are fixtures that typically flank the mirror, mounted vertically on either side. In my experience, two sconces, one on each side, usually provide the most flattering light for faces. This side lighting minimizes shadows under the chin and eyes, a common problem with only overhead lighting.
Sconces often offer a more decorative touch, fantastic for creating symmetry and elegance. However, they require more wall space than a single bar light.
If you have a double vanity, consider three sconces – one in the middle and one on each end – for truly balanced illumination. Key here is consistent height and adequate spacing from the mirror.
Recessed Lighting as an Accent
While not strictly vanity lights, recessed lights can play a vital supporting role. I’ve often used them directly over the vanity area, especially in larger bathrooms or in conjunction with bar lights or sconces, to add ambient or task lighting.
They’re great for general room illumination but don’t rely solely on them for tasks like shaving or applying makeup, as they can cast overhead shadows.
Think of them as supplemental lighting that enhances overall brightness and can highlight specific features, rather than the primary source for your reflection. Combining different layers of light always yields the best results.
Choosing the Right Size and Placement for Your Bathroom Vanity Light Fixtures
Getting the size and placement right is absolutely critical. I’ve seen countless otherwise beautiful bathrooms undermined by poorly scaled or badly positioned bathroom vanity light fixtures. It’s not just about aesthetics; it profoundly impacts functionality.
Sizing It Up: Width and Height Considerations
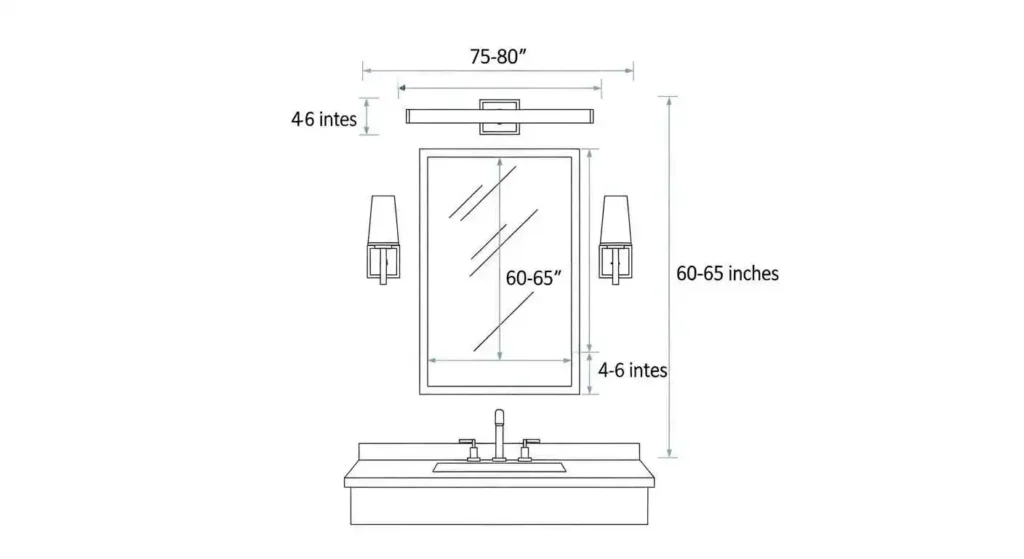
For a single vanity, a general rule of thumb for bar lights is that the fixture should be roughly 75% of the width of your mirror or vanity cabinet. If you have a 36-inch vanity, aim for a light bar around 27 inches wide.
Going too wide makes the fixture look disproportionate, while too narrow creates dark spots.
When it comes to height, the bottom edge of your bar light fixture should ideally be positioned about 75-80 inches from the finished floor, or approximately 3-6 inches above the top of your mirror frame. This height helps illuminate your face without creating harsh shadows from directly overhead.
For sconces, aim for the center of the light source (the bulb) to be roughly 60-65 inches from the finished floor. This usually puts the light at about eye level, ideal for minimizing shadows and providing flattering illumination.
The distance from the mirror edge is also important; I typically recommend placing them 4-6 inches out from the sides of the mirror. This ensures an even spread of light and prevents the fixtures from feeling cramped.
If you’re working with a large mirror or a custom setup, these numbers might flex, but they’re solid starting points.
Optimal Placement for Flattering Vanity Lighting
Beyond just dimensions, think about the light source itself. You want the light to hit your face directly and evenly. This is why side-mounted sconces are often preferred for task lighting around a vanity.
If you’re using an overhead bar light, ensure it has multiple bulbs and diffuses light well to minimize harshness. The goal is to eliminate shadows under your chin, nose, and eyes, which can be particularly tricky.
I always tell clients to imagine themselves standing at the vanity; where do you need the most light? It’s usually directly in front of and slightly to the sides of your face. Remember, the mirror itself reflects light, so the fixture’s position relative to the mirror is key to how the light interacts with your reflection.
LED vs. Traditional Bulbs: Making the Smart Choice for Bathroom Vanity Light Fixtures
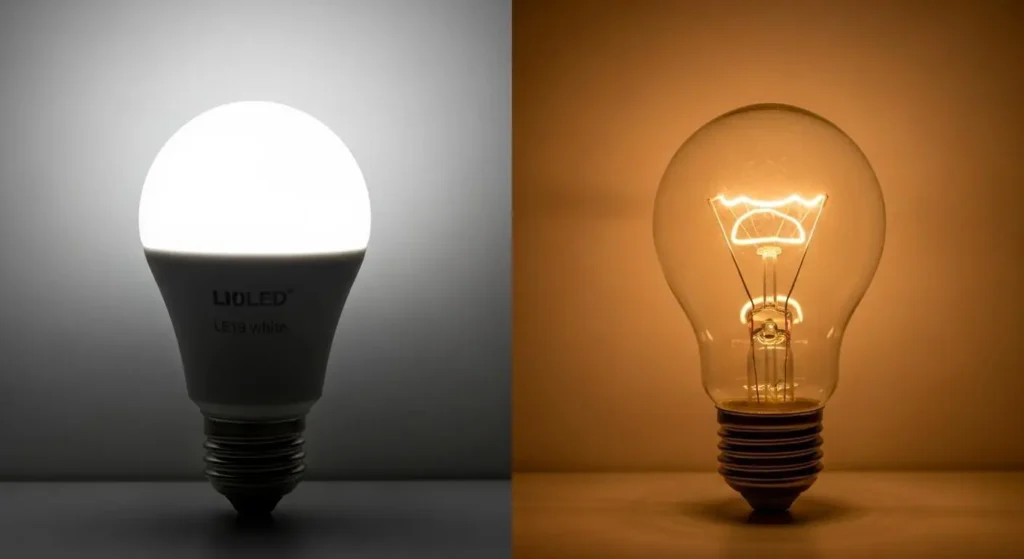
This is a conversation I have on almost every project. The choice between LED (Light Emitting Diode) and traditional incandescent or halogen bulbs for your bathroom vanity light fixtures isn’t just about energy efficiency anymore; it’s about longevity, light quality, and overall cost-effectiveness.
The Clear Advantages of LED
Hands down, I recommend LEDs for almost all new installations. Why? Let’s break it down.
Longevity is a huge factor. A good quality LED bulb can last 25,000 to 50,000 hours, whereas an incandescent might only last 1,000-2,000 hours. That translates to years, even decades, of not having to change bulbs – a big win for hard-to-reach fixtures.
Then there’s energy efficiency. LEDs use significantly less wattage to produce the same amount of light (lumens). This means lower electricity bills, which adds up over time.
But it’s not just about savings. The light quality of modern LEDs is fantastic. You can choose from a wide range of color temperatures, typically measured in Kelvin (K).
For a bathroom vanity, I generally suggest something in the 2700K to 3000K range for a warm, inviting feel, or up to 4000K for a brighter, more neutral white light excellent for tasks like applying makeup. Anything higher, like 5000K, can feel a bit too cool and sterile.
Many LED fixtures also offer dimming capabilities, a feature I highly recommend for any bathroom to adjust the ambiance. Look for “dimmable” on the packaging.
When Traditional Might Still Fit
While I champion LEDs, there are still situations where traditional bulbs might be considered. If you’re simply replacing bulbs in an existing fixture that isn’t compatible with certain LED types or dimmers, sticking with traditional can be easier.
Also, some specialty fixtures, particularly antique or highly decorative ones, might be designed exclusively for the heat dissipation and bulb shape of incandescent bulbs.
However, bulb technology has advanced rapidly, and you can usually find LED equivalents for almost any base type now. The initial cost of LED bulbs can be higher, but the long-term savings in energy and replacement costs typically outweigh that upfront expense within a year or two. Don’t let the sticker shock scare you away; it’s an investment that pays off.
Navigating Modern vs. Classic Styles in Bathroom Vanity Light Fixtures
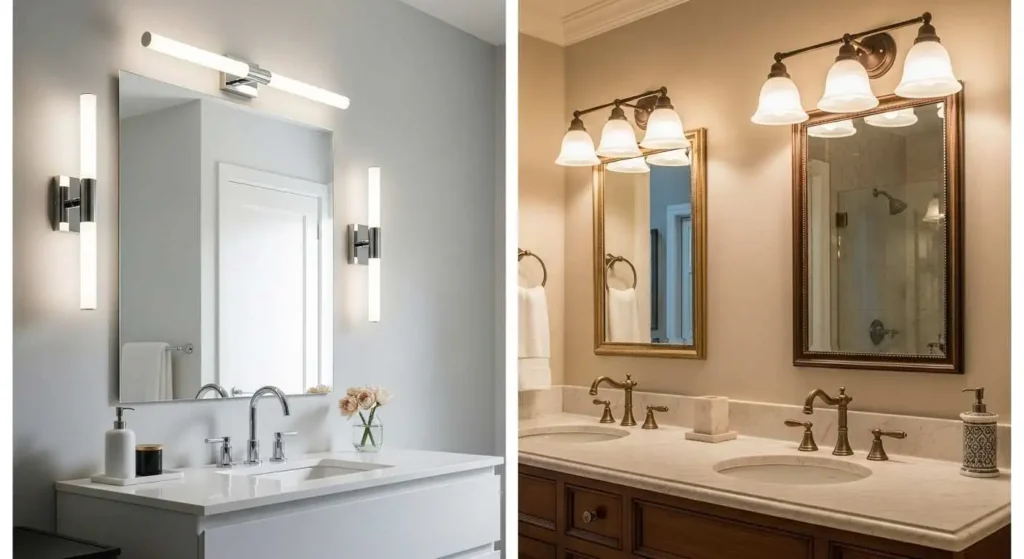
The style of your bathroom vanity light fixtures plays a huge role in defining the overall aesthetic of your bathroom. This is where personal taste truly comes into play, but it’s also important to consider how the fixtures will integrate with your existing or planned finishes.
Embracing Modern Aesthetic
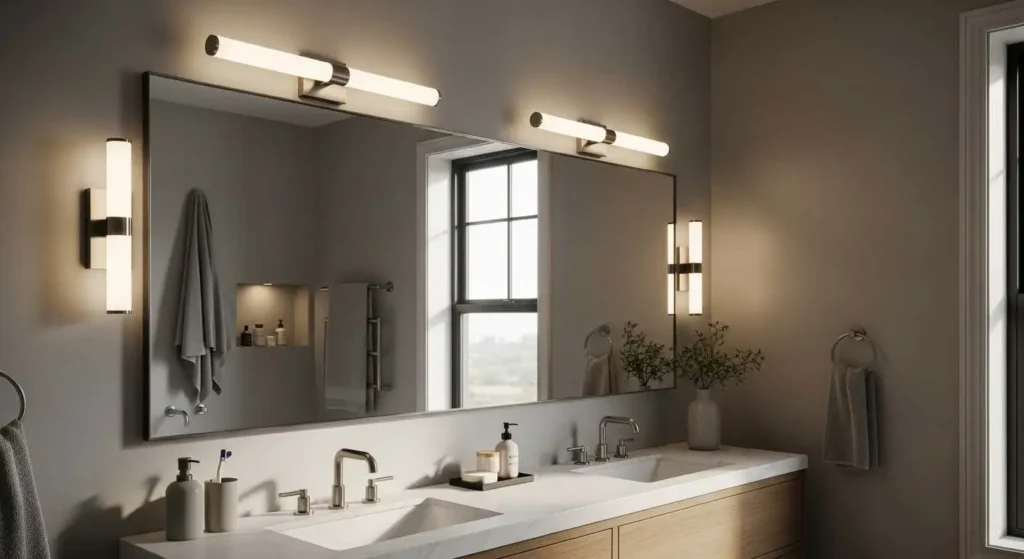
Modern vanity lights often feature clean lines, minimalist designs, and sleek finishes like brushed nickel, matte black, or polished chrome. They might incorporate integrated LED strips or frosted glass diffusers for a seamless look.
Think geometric shapes, unadorned metalwork, and often a focus on functionality with a high-design flair. For instance, a linear LED bar light spanning the vanity width, or individual sconces with simple cylindrical glass shades.
If your bathroom leans towards contemporary, industrial, or even transitional styles, modern fixtures will complement it beautifully. I’ve installed plenty of these, and they always make a statement when paired correctly. They often feel lighter and less visually imposing than some classic designs.
The Enduring Appeal of Classic Designs
On the other hand, classic or traditional vanity lights often draw inspiration from historical periods, featuring more intricate details, ornate scrollwork, and perhaps a wider array of finishes like oil-rubbed bronze, antique brass, or even crystal accents. Shades might be bell-shaped, frosted, or textured glass.
These fixtures evoke a sense of timeless elegance and warmth. If your bathroom has a farmhouse, vintage, or traditional design, classic bathroom vanity light fixtures will be a natural fit. They can add a touch of grandeur and sophistication.
It’s all about creating a cohesive look. A common mistake I see is mixing stark modern fixtures with very traditional faucets and cabinet hardware. While mixing can work, it needs to be done thoughtfully to avoid a disjointed appearance. Consistency in style and finish throughout your bathroom makes a huge difference.
Crucial Installation Tips for Your Bathroom Vanity Light Fixtures
Alright, you’ve picked out your perfect bathroom vanity light fixtures. Now comes the part where the rubber meets the road: installation. As a contractor, I can’t stress enough the importance of doing this safely and correctly. If you’re not comfortable with electrical work, please, hire a licensed electrician. This isn’t a DIY job for the faint of heart or inexperienced.
Safety First: Power and Wiring
Before you even think about touching wires, TURN OFF THE POWER to the bathroom circuit at your main electrical panel. Double-check it with a non-contact voltage tester. Seriously, don’t skip this step. I’ve seen enough close calls to know it’s not worth the risk.
Once the power is off, you’ll be dealing with three main wires: the hot (black), neutral (white), and ground (green or bare copper). Always match black to black, white to white, and ground to ground.
Make sure your wire nuts are securely twisted on and that there are no exposed copper strands outside the wire nut. Loose connections are a fire hazard, plain and simple.
Mounting and Securing Your Fixture
Most vanity lights come with a mounting bracket that attaches to your electrical box. Secure this bracket firmly. If the fixture is heavy, make sure the electrical box is adequately supported, or use appropriate wall anchors if the fixture needs additional mounting points.
Leveling is key here. Nothing looks worse than a crooked light fixture. Use a small level to ensure it’s perfectly straight before tightening everything down.
Take your time. Once the bracket is secure, connect your wires, then carefully tuck them into the electrical box, making sure no wires are pinched. Finally, align the fixture with the mounting screws or clips and secure it in place. Some fixtures have a threaded rod and decorative cap; others might use small screws on the side.
The Final Touches and Testing
With the fixture mounted, install your bulbs (LEDs, of course!). Then, and only then, go back to your electrical panel and turn the power back on. Test the light switch.
If everything works as expected, congratulations! Take a moment to admire your work.
If it doesn’t, turn the power off immediately and re-check your connections. On a recent project, we encountered a custom-made fixture with a slightly damaged wire from shipping. A quick fix before installation saved a lot of headaches.
It’s these little details that separate a good installation from a great one. Always read the manufacturer’s instructions, as there can be specific nuances for different models. Don’t assume all installations are identical.
Conclusion
Choosing and installing the right bathroom vanity light fixtures might seem like a small detail in the grand scheme of a renovation, but it makes a monumental difference in how you experience your bathroom every single day. From understanding the different types and ensuring proper sizing and placement, to making smart bulb choices and tackling the installation safely, each step contributes to a functional, beautiful, and long-lasting result.
I’ve helped folks transform their bathrooms for years, and I can tell you, the right lighting truly illuminates a space in every sense of the word. Don’t rush this decision; take the time to choose fixtures that not only look great but perform flawlessly for your daily needs. Your morning routine will thank you for it.
Ready to find the perfect lighting solution for your bathroom? Explore our full range of bathroom vanity light fixtures today and let us help you light up your space!
How high should a vanity light be?
For an overhead bar light, position the bottom edge about 75-80 inches from the finished floor, or 3-6 inches above the top of your mirror. For side-mounted sconces, the center of the light source should be approximately 60-65 inches from the finished floor, roughly at eye level.
What is the best lighting for a bathroom vanity?
The best lighting combines side-mounted sconces with an overhead bar light or recessed lighting. This layered approach minimizes shadows and provides both ambient and task-specific illumination, ensuring you get clear, flattering light for all your vanity activities.
Can you put any light fixture in a bathroom?
No, not just any fixture. Bathrooms are considered damp or wet locations. You need fixtures specifically rated for damp or wet environments to ensure safety and compliance with electrical codes. Always check the fixture’s rating before purchase.
How many lights should be above a vanity?
For a single vanity, one overhead bar light that is 75% of the mirror’s width is often sufficient. However, for the best results and most flattering light, two side-mounted sconces are ideal. For double vanities, consider one central bar light or two sets of sconces.
What type of bulb is best for a bathroom vanity?
LED bulbs are consistently the best choice for bathroom vanity light fixtures. They offer superior longevity, energy efficiency, and a wide range of color temperatures (2700K-4000K recommended) to create the perfect ambiance and task lighting.
This comprehensive guide provides contractors and DIY enthusiasts with expert advice on selecting and safely installing bathroom vanity light fixtures, covering types, sizing, bulb choices, styles, and crucial installation steps for a perfect bathroom.
Ensure Electrical Safety and Prepare Wiring
Begin by turning off the power to the bathroom circuit at your main electrical panel and verify it with a non-contact voltage tester to prevent electric shock. Then, identify the hot (black), neutral (white), and ground (green or bare copper) wires from the electrical box, preparing them for connection.
Connect the Fixture Wiring
Carefully match and connect the fixture’s wires to the corresponding house wires: black-to-black (hot), white-to-white (neutral), and ground-to-ground. Securely twist wire nuts onto each connection, ensuring no exposed copper strands are visible, to prevent fire hazards and ensure proper operation.
Mount and Secure the Fixture Bracket
Attach the mounting bracket, provided with your vanity light, firmly to the electrical box in the wall. If the fixture is heavy or requires additional support, use appropriate wall anchors. Use a small level to ensure the bracket is perfectly straight before proceeding.
Install the Light Fixture
Carefully tuck all connected wires into the electrical box, ensuring they are not pinched. Align the fixture with the mounting screws or clips on the bracket and secure it in place according to the manufacturer’s instructions. Take care to ensure the fixture is level for optimal aesthetic alignment.
Install Bulbs and Test Operation
Once the fixture is securely mounted, install the recommended LED bulbs. Return to your electrical panel and turn the power back on to the bathroom circuit. Test the light switch to confirm that the new bathroom vanity light fixture is operating correctly. If it doesn’t work, turn off the power immediately and re-check all connections.